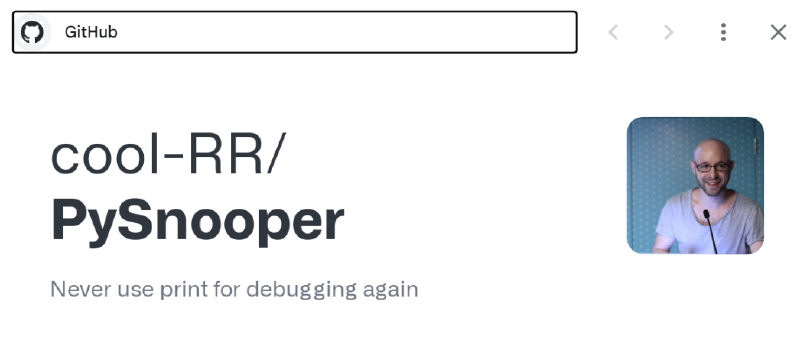
为什么需要PySnooper?
在Python开发过程中,print调试法和断点调试法是最常用的调试手段。但面对复杂逻辑时,传统方法存在明显不足:
- print语句需要手动添加/删除,破坏代码整洁性
- IDE断点调试在远程服务器场景难以使用
- 多线程/异步场景调试困难
PySnooper通过智能日志记录机制,实现了零侵入式调试,提供了另一种直观、便利地观测调试手段
核心功能详解
1. 智能上下文追踪
比如我们编写一个递归函数
 1
 2
 3
 4
 5
 6
 7
 8
 9
10
|
import pysnooper

@pysnooper.snoop()
def factorial(n):
    if n == 1:
        return 1
    else:
        return n * factorial(n-1)

factorial(3)
|
输出示例:
 1
 2
 3
 4
 5
 6
 7
 8
 9
10
11
12
13
14
15
16
17
18
19
20
21
22
23
24
|
(.venv) C:\Chengxiaqiucao\AI
python ai_test.py
Source path:... C:\Chengxiaqiucao\AI\ai_test.py
Starting var:.. n = 3
20:14:50.353061 call         9 def factorial(n):
20:14:50.357038 line        10     if n == 1:
20:14:50.357103 line        13         return n * factorial(n-1)
    Starting var:.. n = 2
    20:14:50.357159 call         9 def factorial(n):
    20:14:50.357220 line        10     if n == 1:
    20:14:50.357291 line        13         return n * factorial(n-1)
        Starting var:.. n = 1
        20:14:50.357348 call         9 def factorial(n):
        20:14:50.357421 line        10     if n == 1:
        20:14:50.357460 line        11         return 1
        20:14:50.357501 return      11         return 1
        Return value:.. 1
        Elapsed time: 00:00:00.000248
    20:14:50.357716 return      13         return n * factorial(n-1)
    Return value:.. 2
    Elapsed time: 00:00:00.000649
20:14:50.357843 return      13         return n * factorial(n-1)
Return value:.. 6
Elapsed time: 00:00:00.005107
|
自动记录函数调用栈和代码执行路径,支持递归函数追踪
2. 变量监控
1
2
3
4
5
6
7
|
@pysnooper.snoop(watch=('result', 'len(data)'))
def process_data(data):
    result = []
    for item in data:
        processed = item * 2
        result.append(processed)
    return sum(result)
|
监控特点:
- 支持表达式监控(如
len(data))
- 实时显示变量类型
- 数值变化提示
3. 上下文管理模式、输出到文件
1
2
3
|
# 上下文管理器模式
with pysnooper.snoop(output='/var/log/debug.log'):
    critical_operation()
|
4. 多处跟踪时指定前缀
 1
 2
 3
 4
 5
 6
 7
 8
 9
10
11
|
@pysnooper.snoop(prefix='[add]')
def add(a, b):
    return a + b

@pysnooper.snoop(prefix='[main]')
def main():
    result = add(5, 7)
    return result

result = main()
print(f"Final result: {result}")
|
输出时会显示指定的不同前缀
 1
 2
 3
 4
 5
 6
 7
 8
 9
10
11
12
13
14
15
16
|
[main]20:29:01.818895 call        17 def main():
[main]20:29:01.819578 line        18     result = add(5, 7)
[add]    Source path:... C:\Chengxiaqiucao\AI\ai_test.py
[add]    Starting var:.. a = 5
[add]    Starting var:.. b = 7
[add]    20:29:01.819791 call        13 def add(a, b):
[add]    20:29:01.820558 line        14     return a + b
[add]    20:29:01.820758 return      14     return a + b
[add]    Return value:.. 12
[add]    Elapsed time: 00:00:00.001314
[main]New var:....... result = 12
[main]20:29:01.821253 line        19     return result
[main]20:29:01.821503 return      19     return result
[main]Return value:.. 12
[main]Elapsed time: 00:00:00.002834
Final result: 12
|
5. 设置跟踪深度
如果代码中牵涉多层函数调用,还可以通过指定记录深度,默认深度为 1,灵活结合depth参数,可以帮助我们重点查看关注部分
 1
 2
 3
 4
 5
 6
 7
 8
 9
10
|
@pysnooper.snoop(depth=1)
def outer_function(x):
    return inner_function(x + 1)

@pysnooper.snoop(depth=2)
def inner_function(y):
    return y * 2

result = outer_function(10)
print(f"Outer function result: {result}")
|
输出:
 1
 2
 3
 4
 5
 6
 7
 8
 9
10
11
12
13
14
|
Starting var:.. x = 10
20:37:49.360851 call         9 def outer_function(x):
20:37:49.361569 line        10     return inner_function(x + 1)
    Source path:... C:\Chengxiaqiucao\ai\ai_test.py
    Starting var:.. y = 11
    20:37:49.361734 call        13 def inner_function(y):
    20:37:49.362077 line        14     return y * 2
    20:37:49.362184 return      14     return y * 2
    Return value:.. 22
    Elapsed time: 00:00:00.000589
20:37:49.362380 return      10     return inner_function(x + 1)
Return value:.. 22
Elapsed time: 00:00:00.001683
Outer function result: 22
|
总结
有了这个工具, 我们在调试时,特别是在一些服务器上进行代码调测,就可以通过一行装饰代码实现运行变量和过程的监测了,远离print大法的繁杂啦!
