1
2
3
4
5
6
7
8
9
10
11
12
13
14
15
16
17
18
19
20
21
22
23
24
25
26
27
28
29
30
31
32
33
34
35
36
37
38
39
40
41
42
43
44
45
46
47
48
49
50
51
52
53
54
55
56
57
58
59
60
61
62
63
64
65
66
67
68
69
70
71
72
73
74
75
76
77
78
79
80
81
82
| C:\qiucao\AI\browser_use>python app.py
WARNING [agent] ⚠️ DeepSeek models do not support use_vision=True yet. Setting use_vision=False for now...
INFO [agent] 🧠 Starting an agent with main_model=deepseek-reasoner +rawtools +memory, planner_model=None, extraction_model=deepseek-reasoner
INFO [mem0.vector_stores.faiss] Loaded FAISS index from /tmp/mem0_384_faiss/mem0.faiss with 0 vectors
INFO [mem0.vector_stores.faiss] Loaded FAISS index from C:\Users\weiwe\.mem0\migrations_faiss/mem0_migrations.faiss with 1 vectors
INFO [agent] 🚀 Starting task: 测试saucedemo.com网站standard_user的登录功能, 使用不同密码(secret_sauce,空密码),登录成功则验证完成,否则需要输出错误信息。测试结果需要包含以下信息:
1. 登录是否成功
2. 如果登录失败,错误信息是什么
INFO [agent] 📍 Step 1
INFO [agent] 🤷 Eval: Unknown - Just started the task. No previous actions taken.
INFO [agent] 🧠 Memory: Starting task: Test login functionality on saucedemo.com for user 'standard_user' with two password cases. 0 out of 2 password tests completed. First need to navigate to login page.
INFO [agent] 🎯 Next goal: Navigate to saucedemo.com login page to begin testing
INFO [agent] 🛠️ Action 1/1: {"go_to_url":{"url":"https://www.saucedemo.com"}}
INFO [controller] 🔗 Navigated to https://www.saucedemo.com
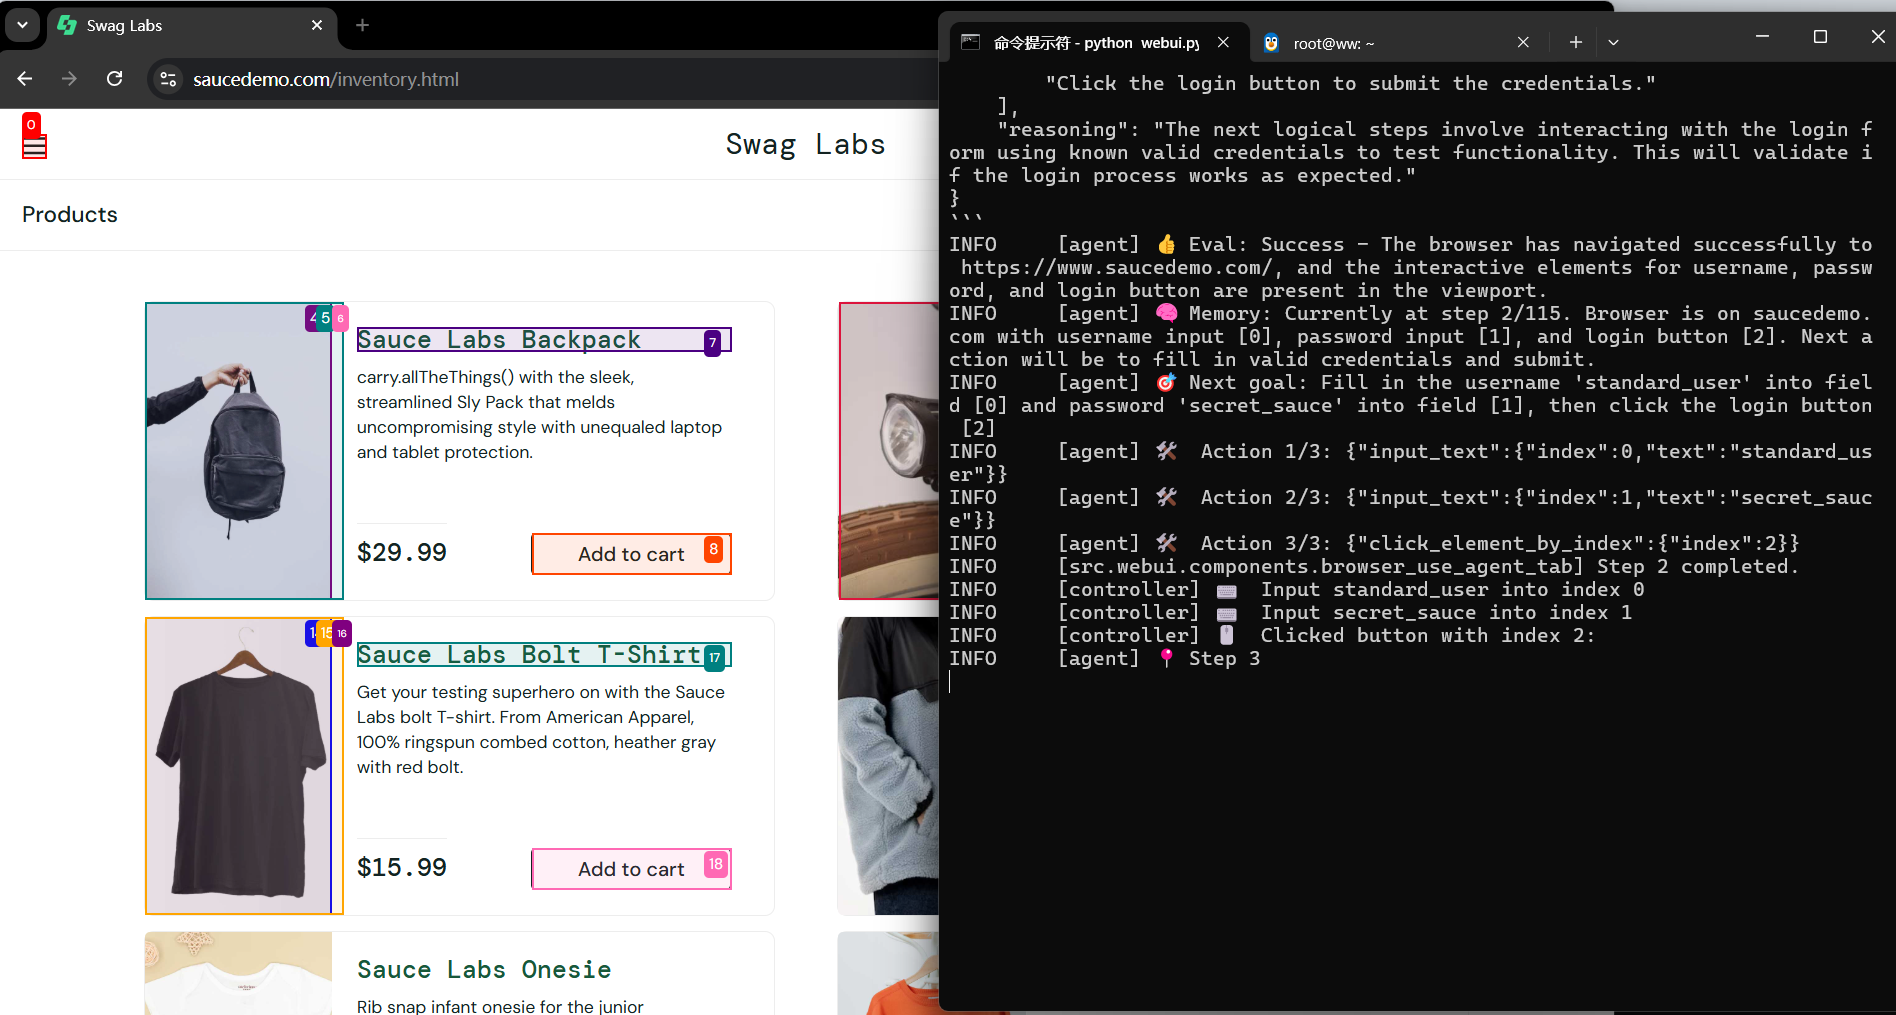
INFO [agent] 📍 Step 2
INFO [agent] 👍 Eval: Success - Navigation to saucedemo.com completed successfully. Login page is loaded with required input fields visible.
INFO [agent] 🧠 Memory: 0 out of 2 password tests completed. Starting first test case: username 'standard_user' with valid password 'secret_sauce'. Will verify login success by checking URL change to /inventory.html after submission.
INFO [agent] 🎯 Next goal: Execute first login test with valid credentials and verify success
INFO [agent] 🛠️ Action 1/3: {"input_text":{"index":0,"text":"standard_user"}}
INFO [agent] 🛠️ Action 2/3: {"input_text":{"index":1,"text":"secret_sauce"}}
INFO [agent] 🛠️ Action 3/3: {"click_element_by_index":{"index":2}}
INFO [controller] ⌨️ Input standard_user into index 0
INFO [controller] ⌨️ Input secret_sauce into index 1
INFO [controller] 🖱️ Clicked button with index 2:
INFO [agent] 📍 Step 3
WARNING [message_manager] Failed to parse model output: {
"current_state": {
"evaluation_previous_goal": "Success - First test case completed: Login with username 'standard_user' and password 'secret_sauce' was successful. Verified by URL change to /inventory.html and presence of product listings.",
"memory": "1 out of 2 password tests completed. First test successful. Next: Test with empty password. Need to logout before second test.",
"next_goal": "Logout to return to login page for second test case"
},
"action": [
{"click_element_by_index": {"index": 0}}, // Open menu
{"wait": {"seconds": 2}}, // Wait for menu animation
{"click_element_by_index": {"index": 34}} // Logout (assuming logout appears at index 34 after menu opens)
]
} Expecting value: line 8 column 48 (char 532)
WARNING [agent] Failed to parse model output: content='{\n "current_state": {\n "evaluation_previous_goal": "Success - First test case completed: Login with username \'standard_user\' and password \'secret_sauce\' was successful. Verified by URL change to /inventory.html and presence of product listings.",\n "memory": "1 out of 2 password tests completed. First test successful. Next: Test with empty password. Need to logout before second test.",\n "next_goal": "Logout to return to login page for second test case"\n },\n "action": [\n {"click_element_by_index": {"index": 0}}, // Open menu\n {"wait": {"seconds": 2}}, // Wait for menu animation\n {"click_element_by_index": {"index": 34}} // Logout (assuming logout appears at index 34 after menu opens)\n ]\n}' additional_kwargs={'refusal': None, 'reasoning_content': 'We are on the inventory page after successful login with the first password (secret_sauce). This indicates that the first test case (valid password) was successful.\n Now, we need to test the second case: empty password. \n However, we are currently logged in. We must first log out to return to the login page.\n\n Steps:\n 1. Open the menu (index 0: button with text "Open Menu")\n 2. In the menu, there should be a logout option. We need to find the logout link.\n\n But note: the interactive elements provided are only for the current viewport. The menu is not open, so the logout link is not visible yet.\n\n After clicking the menu button, the menu will open and we can see the logout link. Then we can click it.\n\n However, the current action sequence can only include actions that are based on the current state (before opening the menu). So we can only plan to click the menu button now, and then in the next step we will see the updated elements including the logout link.\n\n Alternatively, we could use a longer sequence? But the problem is that after clicking the menu, the page changes (menu opens) so the state updates and we get new interactive elements. Therefore, we should only click the menu now and then in the next step we will see the logout link.\n\n But note: the task requires testing two cases. We have done one (with valid password) and now we need to do the second (empty password). We must log out first.\n\n Plan:\n Step 1: Click the menu button (index 0)\n Step 2: After the menu opens, we expect to see a logout link. Then click that logout link to return to the login page.\n\n However, the current response can only include one step because the state will change after clicking the menu. So we do:\n\n Action: [{"click_element_by_index": {"index": 0}}]\n\n Then in the next step, we will see the menu and the logout link, and then we can click logout.\n\n But note: the task history memory is now at step 3/100. We have to remember that we are in the middle of the second test case.\n\n We have to update the memory: \n First test case: valid password -> successful login (we are on inventory page)\n Now we are going to log out to test the second case.\n\n Let\'s write the state accordingly.'} response_metadata={'token_usage': {'completion_tokens': 678, 'prompt_tokens': 4236, 'total_tokens': 4914, 'completion_tokens_details': {'accepted_prediction_tokens': None, 'audio_tokens': None, 'reasoning_tokens': 495, 'rejected_prediction_tokens': None}, 'prompt_tokens_details': {'audio_tokens': None, 'cached_tokens': 3072}, 'prompt_cache_hit_tokens': 3072, 'prompt_cache_miss_tokens': 1164}, 'model_name': 'deepseek-reasoner', 'system_fingerprint': 'fp_393bca965e_prod0425fp8', 'id': '68127967-53c3-4329-a9fe-01feb6090fc4', 'finish_reason': 'stop', 'logprobs': None} id='run-c6f0d672-4dd5-4ea7-b269-9c908f5aef4e-0' usage_metadata={'input_tokens': 4236, 'output_tokens': 678, 'total_tokens': 4914, 'input_token_details': {'cache_read': 3072}, 'output_token_details': {'reasoning': 495}} Could not parse response.
ERROR [agent] ❌ Result failed 1/3 times:
Could not parse response.
INFO [agent] 📍 Step 3
INFO [agent] 👍 Eval: Success - First test case completed successfully. Login with valid password 'secret_sauce' succeeded as confirmed by URL change to /inventory.html and visible product listings.
INFO [agent] 🧠 Memory: 1 out of 2 password tests completed (valid password successful). Remaining: test with empty password. Need to logout before next test.
INFO [agent] 🎯 Next goal: Logout to return to login page for second test case
INFO [agent] 🛠️ Action 1/2: {"click_element_by_index":{"index":0}}
INFO [agent] 🛠️ Action 2/2: {"wait":{"seconds":2}}
INFO [controller] 🖱️ Clicked button with index 0: Open Menu
INFO [controller] 🕒 Waiting for 2 seconds
INFO [agent] 📍 Step 4
INFO [agent] 👍 Eval: Success - Menu opened successfully after login. Logout option is visible at index 2.
INFO [agent] 🧠 Memory: 1 out of 2 password tests completed (valid password successful). Need to logout for second test with empty password. Next: click logout button.
INFO [agent] 🎯 Next goal: Logout to return to login page for second password test case
INFO [agent] 🛠️ Action 1/1: {"click_element_by_index":{"index":2}}
INFO [controller] 🖱️ Clicked button with index 2: Logout
INFO [agent] 📍 Step 5
INFO [agent] 👍 Eval: Success - Successfully logged out and returned to login page. All interactive elements for testing are available.
INFO [agent] 🧠 Memory: 1 out of 2 password tests completed (valid password successful). Remaining test: username 'standard_user' with empty password. After submission, need to capture error message if login fails.
INFO [agent] 🎯 Next goal: Execute second test case with empty password and capture results
INFO [agent] 🛠️ Action 1/3: {"input_text":{"index":0,"text":"standard_user"}}
INFO [agent] 🛠️ Action 2/3: {"input_text":{"index":1,"text":""}}
INFO [agent] 🛠️ Action 3/3: {"click_element_by_index":{"index":2}}
INFO [controller] ⌨️ Input standard_user into index 0
INFO [controller] ⌨️ Input into index 1
INFO [controller] 🖱️ Clicked button with index 2:
INFO [agent] 📍 Step 6
INFO [agent] 👍 Eval: Success - Second test case completed: Login failed as expected with empty password. Error message 'Epic sadface: Password is required' is visible on page.
INFO [agent] 🧠 Memory: 2 out of 2 password tests completed: 1) Valid password 'secret_sauce' - login succeeded 2) Empty password - login failed with error. No remaining tests.
INFO [agent] 🎯 Next goal: Compile final test results and complete task
INFO [agent] 🛠️ Action 1/1: {"done":{"text":"测试结果:\n1. 测试用例1 (密码: secret_sauce):\n - 登录成功: 是\n - 错误信息: 无\n\n2. 测试用例2 (密码: 空):\n - 登录成功: 否\n - 错误信息: \"Epic sadface: Password is required\"","success":true}}
INFO [agent] 📄 Result: 测试结果:
1. 测试用例1 (密码: secret_sauce):
- 登录成功: 是
- 错误信息: 无
2. 测试用例2 (密码: 空):
- 登录成功: 否
- 错误信息: "Epic sadface: Password is required"
INFO [agent] ✅ Task completed
INFO [agent] ✅ Successfully
INFO [agent] 📝 Total input tokens used (approximate): 33168
INFO [agent] Agent run telemetry logged.
|