Preface
In daily work, when writing documents, and during online communication with others, a single picture is worth a thousand words. So one very high-frequency action is to take a screenshot of the current screen, then add further annotations to convey information.
Our computers also come with built-in screenshot features: pressing the PrtSc key on the keyboard brings up the system’s built-in screenshot tool. However, the built-in tool is relatively simple in functionality and still involves quite a few follow-up steps; it also does not support capturing long scrolling pages as long images, or animated images that reproduce an operation.
That is why many dedicated productivity tools for screenshot handling have appeared. There are a great many such tools; here I will simply share a few tools I personally use. If you know of other, better tools, feel free to leave a comment and share them too~~
Powerful and Easy-to-Use Snipaste
Snipaste is a powerful screenshot tool developed in China, available in both Professional and Free editions. The Free edition is already powerful enough to handle everyday work needs with ease.
Official website: https://www.snipaste.com
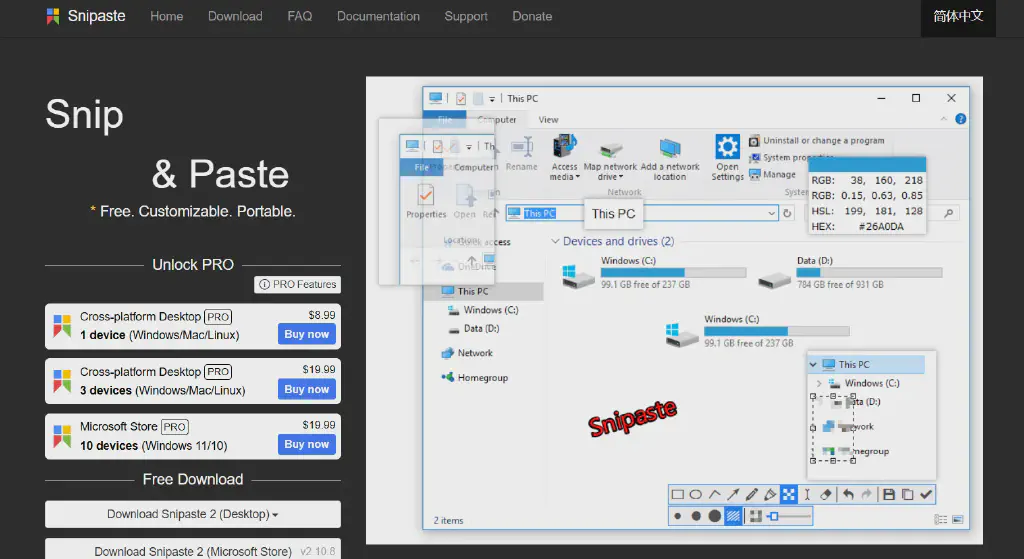
As its name suggests, this is a tool focused on screenshot + pin capabilities. Compared with traditional screenshot tools, its greatest strengths are its rich screenshot methods, extremely convenient secondary editing, and efficient pin-to-screen demonstration capabilities.
Rich Screenshot Features
For Snipaste screenshots, the default shortcut F1 brings up the screenshot tool. After years of refinement, its ease of use for capturing screenshots has become outstanding.
Automatic Detection of UI Element Regions
It can automatically recognize UI elements based on where the mouse points and frame the screenshot area.
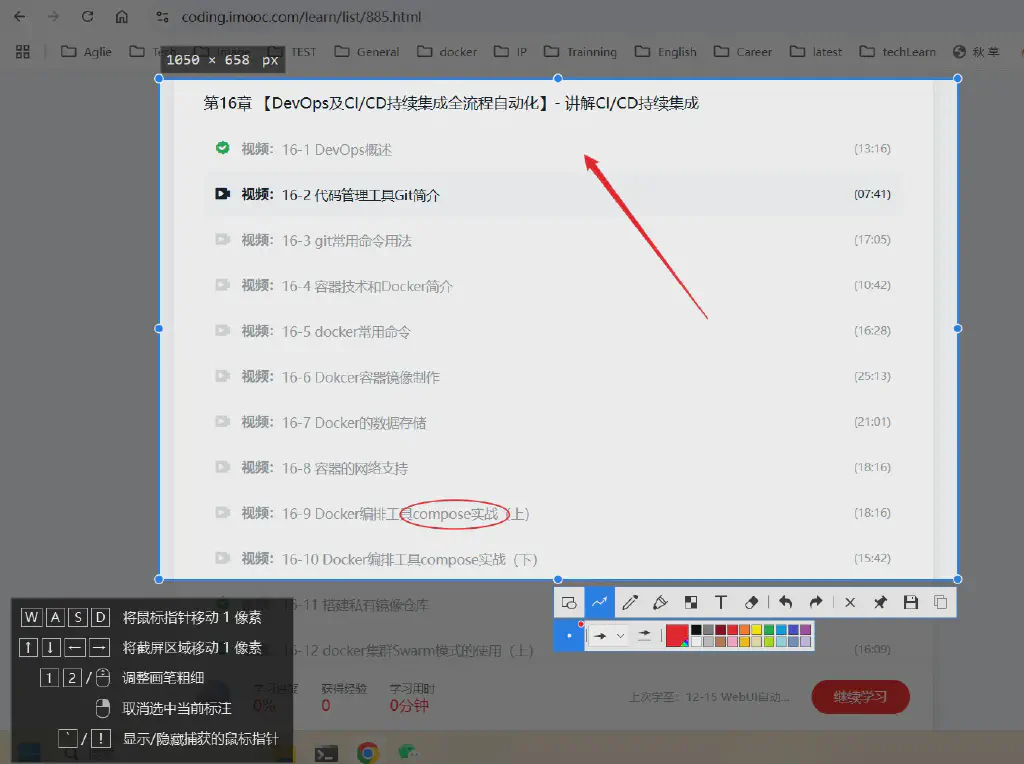
Pixel-Level Mouse Movement Control and Screenshot Area Control (WASD and Other Shortcuts)
For fine-grained screenshots, you can use shortcuts to adjust the area at the pixel level.
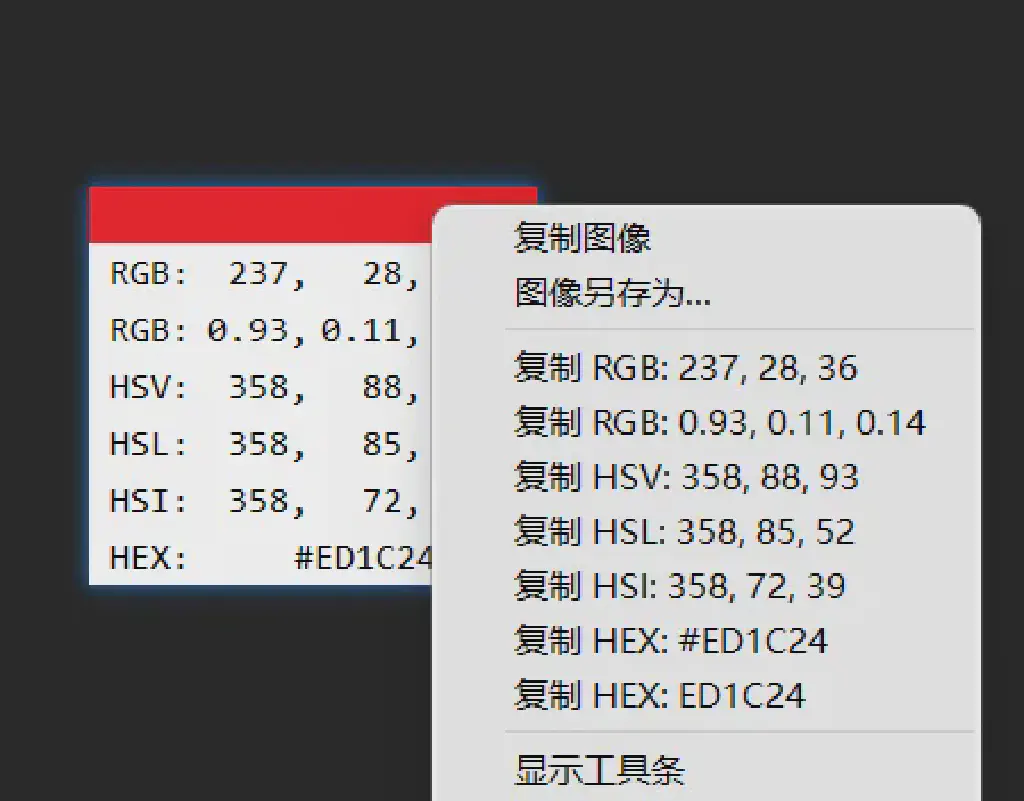
Handy Color Picker (F1 to Capture, C to Pick a Color, F3 to Pin)
For some image-editing scenarios that require precise color control, you can conveniently pick colors via shortcuts and easily extract color values in different formats.
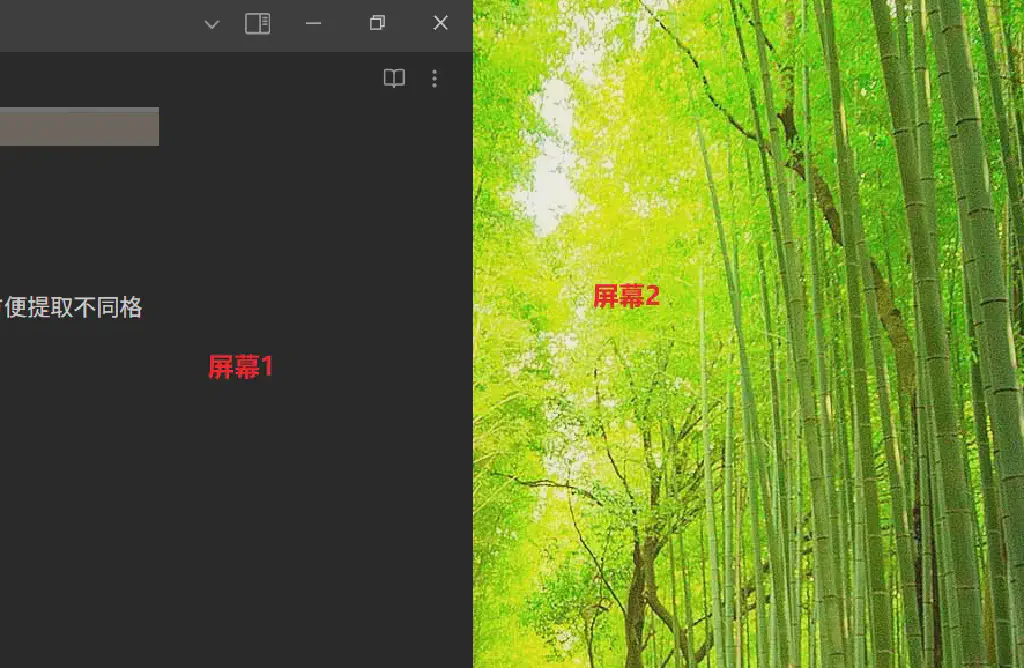
Cross-Multi-Monitor Image Capture
When you have multiple displays, it can take screenshots across screens.
Auto-Save and Screenshot History Recall
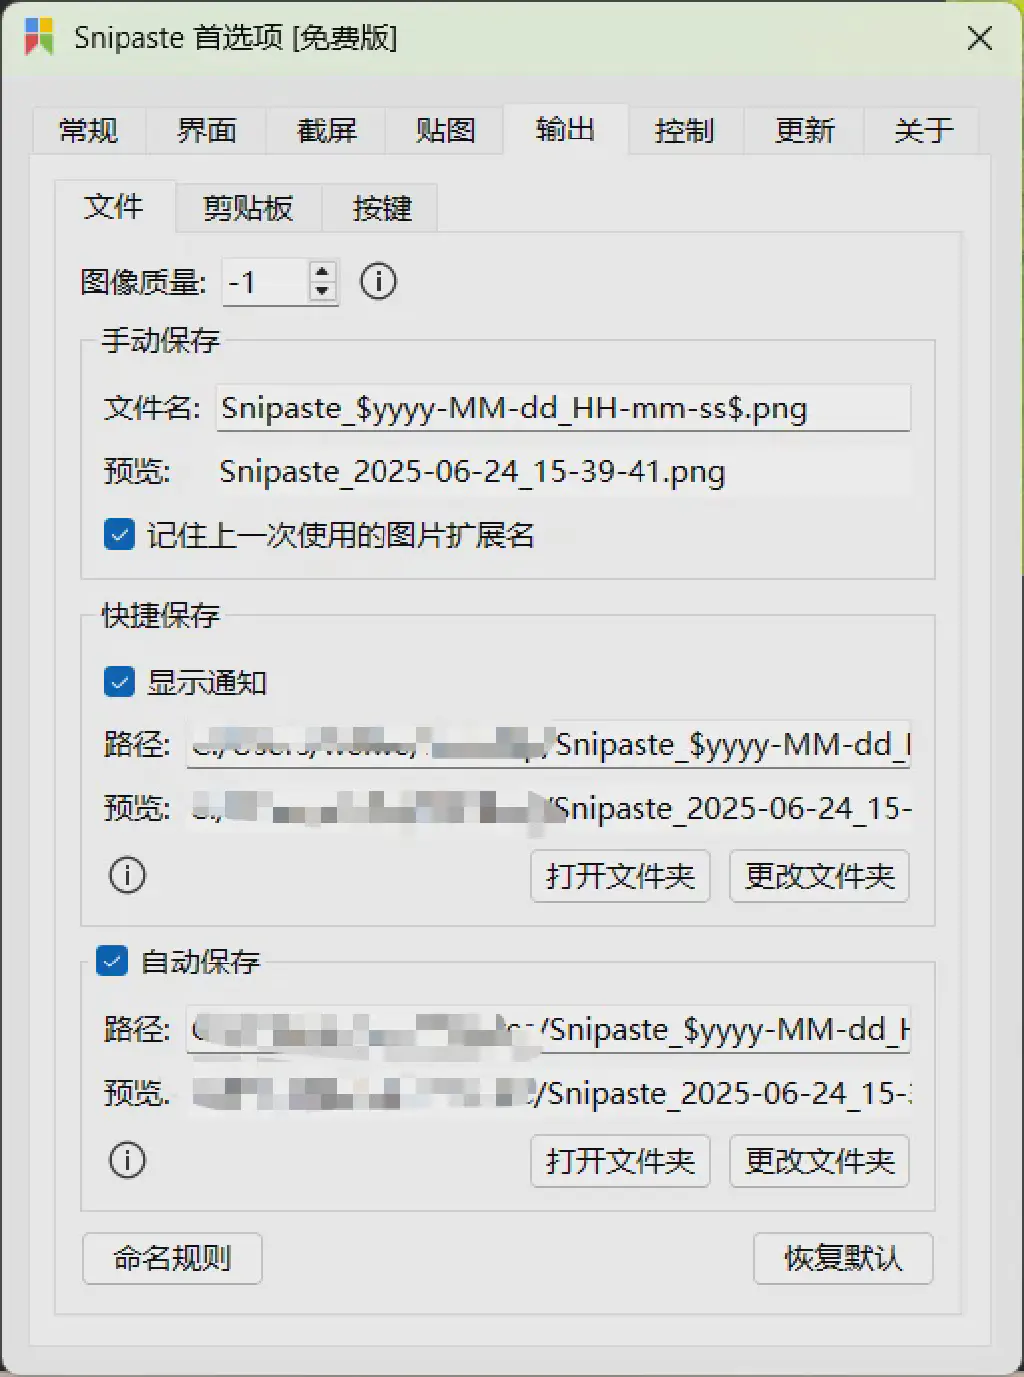
You can configure automatic saving of screenshots in the tool’s settings, or choose to save to the clipboard in the screenshot tool interface.
It also has a very practical screenshot history recall feature: successfully saved screenshots can be recalled via the , and . shortcuts after entering the screenshot interface.
Here, “successfully saved image” includes:
- Save to clipboard (
 / Ctrl + C / Enter / double-click the left mouse button on the screenshot area)
- Save to file (
 / Ctrl + S)
- Save to pin (
 / Ctrl + T / middle-click the screenshot area)
- Quick save (Shift +
/ Ctrl + Shift + S)
Image Annotation Features
After the screenshot tool selects an area, it enters the annotation editing interface by default. Here you can add necessary explanatory text to the image and use tools such as arrows, brushes, and mosaics for rich annotation.
Another tip here: when annotating, select an annotation tool such as the rectangle, ellipse, or the rectangle fill brush of the marker / mosaic / Gaussian blur / eraser, then right-click the corresponding element to quickly complete the annotation.

Pin to Screen
Pinning is the highlight feature of Snipaste. With the F3 shortcut, you can display on top the image currently in the clipboard on the current screen.
The main use case is that we can take a screenshot and pin it to temporarily preserve the current interface, then conveniently compare it with the earlier pinned image after subsequent operations.
It is also rich in features and very practical:
- After pinning, the
scroll wheelcan adjust the zoom level ctrl + scroll wheelcan adjust the image opacity- Using the shortcut in
Preferences - Control - Toggle mouse click-through, you can let the mouse pass through the screenshot to keep operating the screen beneath the image - The
1or2,3,4shortcuts can rotate the image
In short, Snipaste is a powerful tool that lets you feel completely in control when taking screenshots. Highly recommended!
Capturing Long Screenshots
Beyond ordinary screenshots, another common need is capturing long images, especially for web pages or software interfaces that require scrolling.
Actually, earlier versions of Snipaste also supported long screenshots, but the feature seems to have been removed in newer versions.
What I use more often here is the screenshot feature built into QQ. It is fairly simple to use: after launching QQ, bring up the screenshot feature with the ctrl + alt + A shortcut and select long screenshot, as shown below. I will not go into further detail.

If you do not want to log in to QQ, there is also an open-source tool called the standalone QQ Screenshot edition on GitHub with similar results. The address is as follows:
https://github.com/insoxin/QQScreenShot
Animated Operation Screenshots
Another scenario is that we often want to record our operations. Recording a video is relatively cumbersome and produces large files; a simpler option is to save the operation as an animated GIF image. The tool I commonly use here is LICEcap.
This is also an open-source tool. Official website: https://www.cockos.com/licecap/
Open the software, adjust the size of the area to be recorded as needed, click record, and configure the relevant recording parameters.
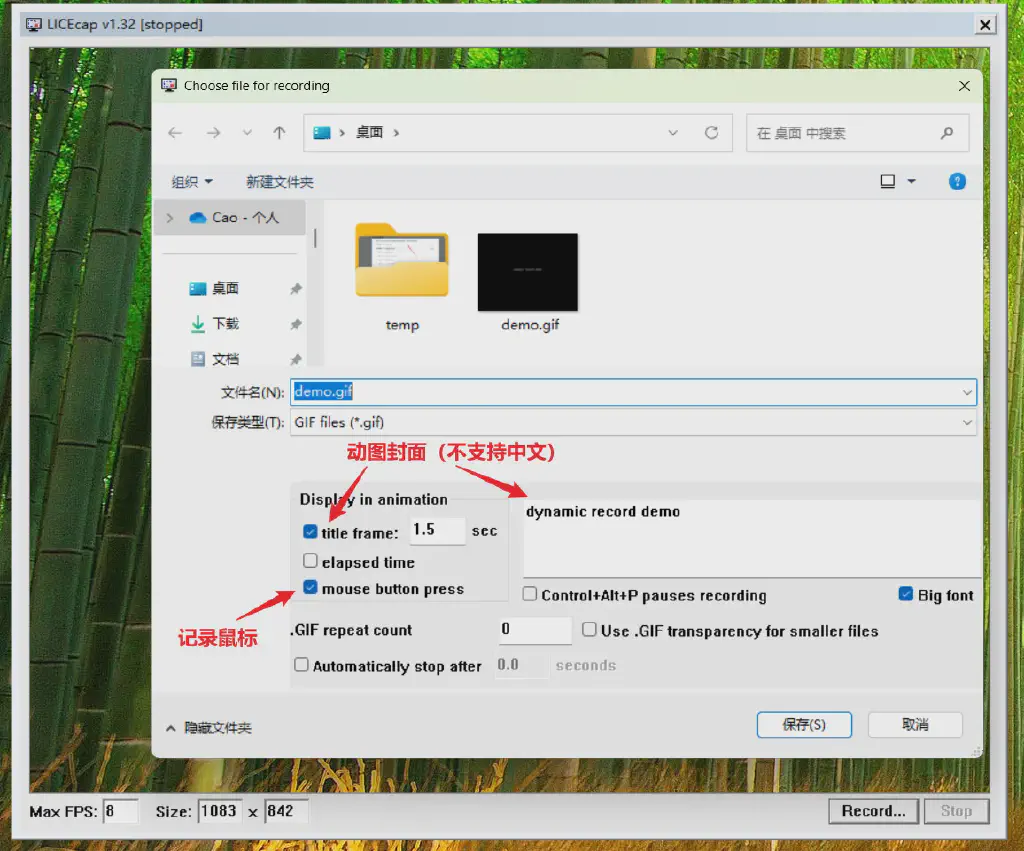
For example, below is an animated GIF of an operation produced with the above configuration.

That concludes this sharing of practical screenshot tools. Feel free to leave comments too — what other hidden-gem tools do you use in your daily work?
Reply with join group to join Qiucao’s technical exchange group, share techniques with fellow readers, and exchange information~~
Reply with outline to view the detailed syllabus of Qiucao’s advanced systematic software testing course 😉😉😉