At present, large-model applications are in full swing. Major LLMs such as Deepseek also provide online assistant services, and combined with mcp-server they can further extend into local tool capabilities.
But for materials strongly tied to local business and data, online large-model training datasets generally cannot cover them, especially some sensitive data or data with high security requirements, for which using online large models is impractical. Therefore, in both personal use and real work, deploying large models locally and adding a local knowledge base is also a rigid requirement.
This article records and shares the process of building a local large model in WSL through Ollama and CherryStudio, and integrating the local model into VS Code’s AI assistant.
Ollama Introduction
Ollama is a simple, easy-to-use local large language model runtime framework developed in Go, designed specifically for conveniently deploying and running large language models (LLMs) on local machines. Ollama is short for Omni-Layer Learning Language Acquisition Model (all-round learning language acceptance model).
Deepseek Local Models and Runtime Configuration
Deepseek currently comes in multiple versions based on the size of the parameter set used for local deployment, ranging from 1.5B to 671B and beyond. The larger the parameter set, the more intelligent the AI, but the higher the hardware requirements accordingly.
Generally, the recommended hardware configurations for different Deepseek model versions are as follows:
| Model | CPU | Memory | Disk | VRAM | Use Case |
|---|---|---|---|---|---|
| DeepSeek-R1-1.5B | 4 cores | 8 GB+ | 3 GB+ | Not required (GTX 1650 optional for CPU acceleration) | Personal use, such as laptops and desktops |
| DeepSeek-R1-7B | 8 cores | 16 GB+ | 8 GB+ | 8 GB+ VRAM (e.g. RTX 3070/4060) | Local development for small and medium enterprises |
| DeepSeek-R1-8B | 8 cores | 16 GB+ | 8 GB+ | 8 GB+ VRAM | Local development for SMEs (lightweight tasks with improved accuracy) |
| DeepSeek-R1-14B | 12 cores | 32 GB+ | 15 GB+ | 16 GB+ VRAM (e.g. RTX 4090 or A5000) | Local development for SMEs (medium-weight tasks) |
| DeepSeek-R1-32B | 16 cores | 64 GB+ | 30 GB+ | 24 GB+ VRAM (e.g. A100 40 GB or RTX 3090) | Professional domain tasks, such as healthcare, research, and law |
| DeepSeek-R1-70B | 32 cores | 128 GB+ | 70 GB+ | Multi-GPU parallel (e.g. 2x A100 80GB or 4x RTX 4090) | Large enterprises or research institutions, professional domain tasks |
| DeepSeek-R1-671B (Full Version) | 64 cores | 512 GB+ | 300 GB+ | Multi-GPU parallel (e.g. 8x A100/H100) | National-level research tasks |
| For individual users like us, we usually choose from 1.5B to 14B based on our own computer configuration. Of course, if you do not use local models frequently, my personal suggestion is to match one tier lower in both configuration and recommended model. |
Deploying Local Deepseek in WSL with Ollama
Because the author currently mainly wants to connect some local data to Deepseek and has no need to use local LLMs frequently, here I choose to deploy DeepSeek-R1-14B. In addition, to avoid the LLM consuming large amounts of resources every time the computer starts up, I want to run the LLM under WSL on a Windows machine.
WSL Configuration
If WSL is not yet enabled on the current system, you can enable it first (the process will not be described in detail; in Windows 11, running WSL install [corresponding Linux distribution] is sufficient to install it).
Check the WSL status from the command line:
| |
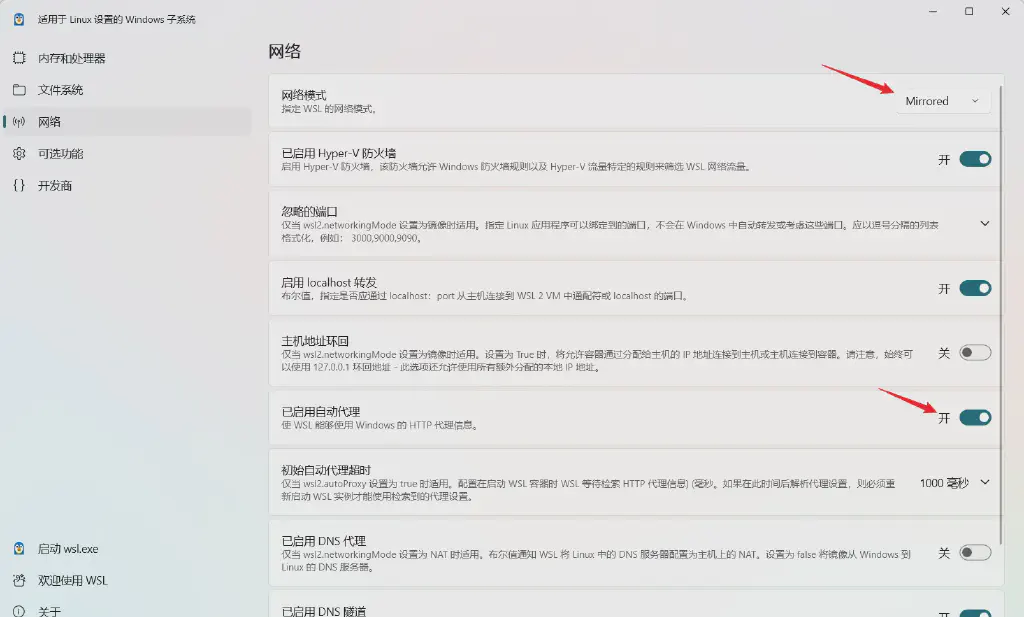
WSL’s default network mode is NAT. Here you can use the WSL Setting program to modify the current configuration and change it to Mirrored mode, sharing the host network.
Installing Ollama
Go to the Ollama official website (https://ollama.com/) download page. Because we are deploying in WSL, choose the Linux installation.
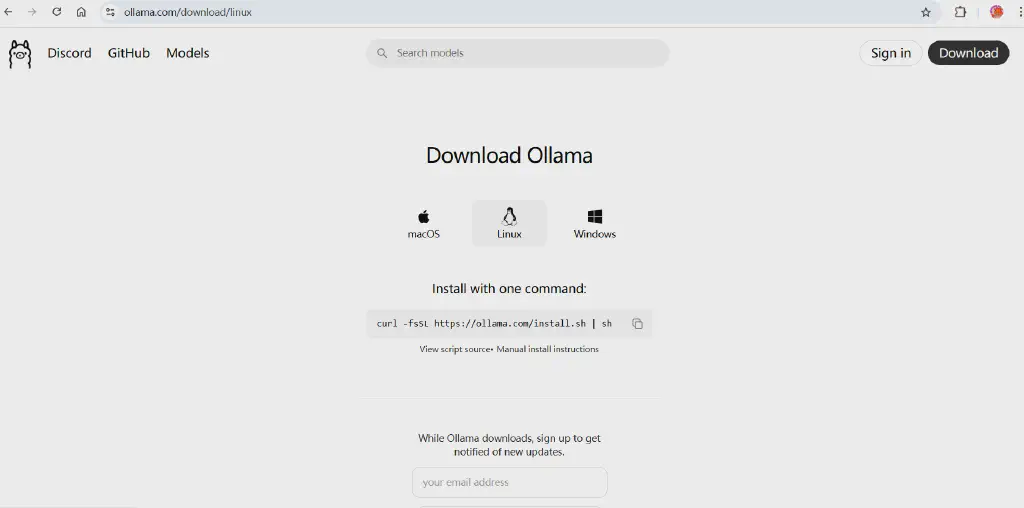
Execute the following command and wait for the download and automatic installation to complete.
| |
Deploying Deepseek
After Ollama is installed, you can select the corresponding large model to install from the list of large models provided by Ollama. The currently supported model list can be found at the following address on the official website: https://ollama.com/library
Execute the following command to download and run Deepseek.
| |
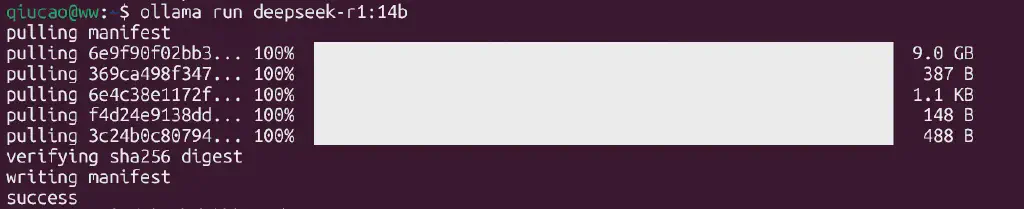
After a successful installation, you can ask a question to test whether Deepseek is providing service normally.

Adding a Knowledge Base Analysis Model
At this point, Deepseek is actually deployed locally. But if we want to use local data and documents through Deepseek, we also need to deploy a semantic vector model (Embedding Model) to convert local data into knowledge base data that the large model can analyze. Here we choose the bge-m3 model, a general-purpose vector model that supports multiple languages, long texts, and a variety of retrieval methods.
Execute:
| |

Managing the Knowledge Base and Providing a Local Interface with Cherry Studio
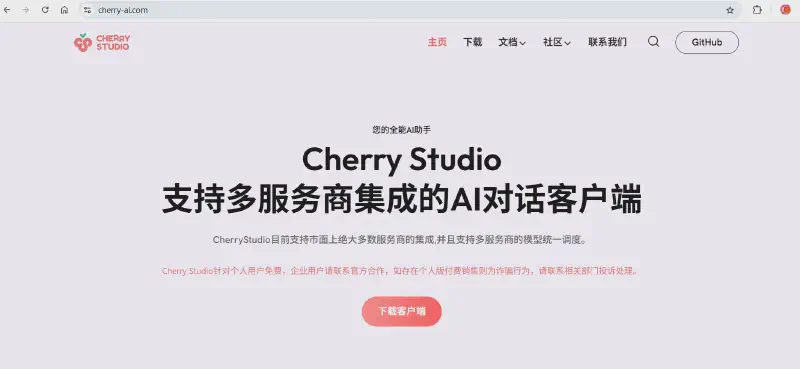
After installing Deepseek, although we can interact with Deepseek from the command line, it is still not friendly enough, and managing the local knowledge base is not convenient either. So here we can also install Cherry Studio, an open-source local AI assistant and knowledge base client. Just download the Windows version from the official website (https://cherry-ai.com) and install it.

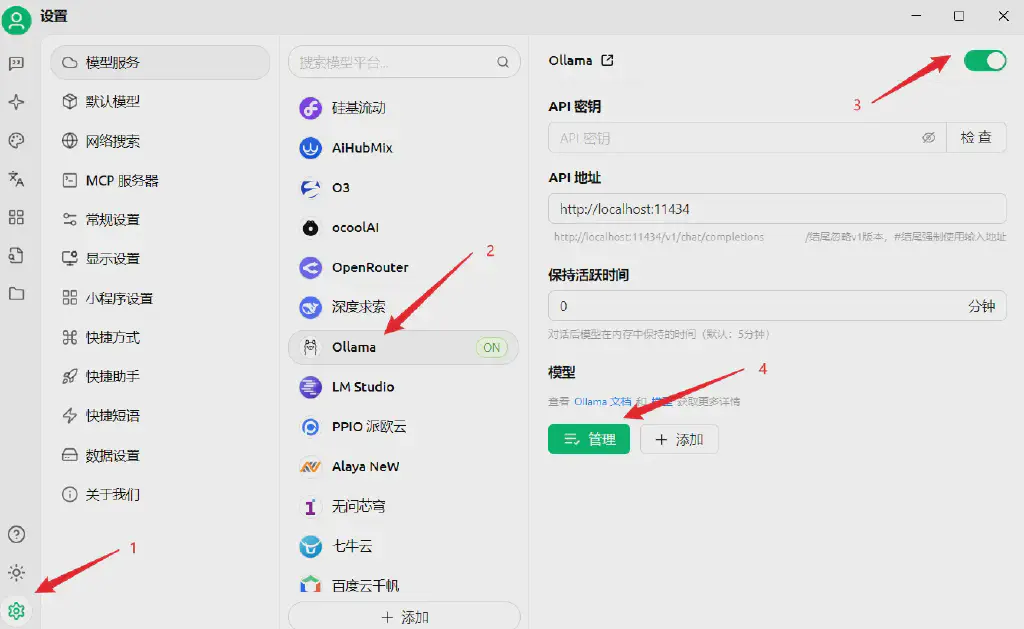
Open Cherry Studio and follow the steps below to add the Deepseek we just deployed through Ollama.
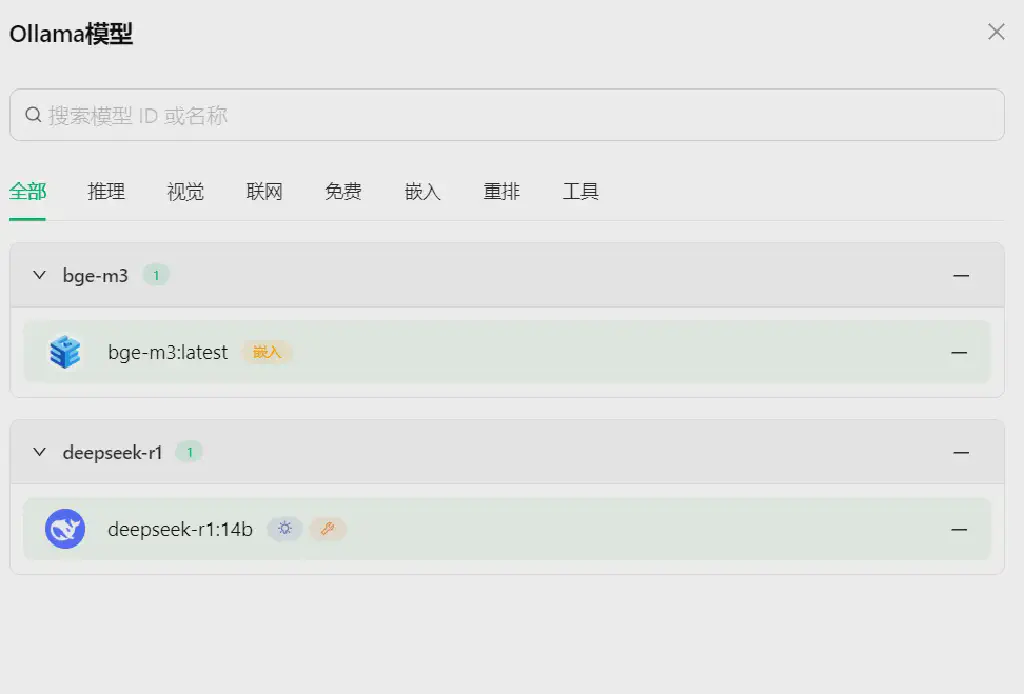
You will see the already installed model; add it in.
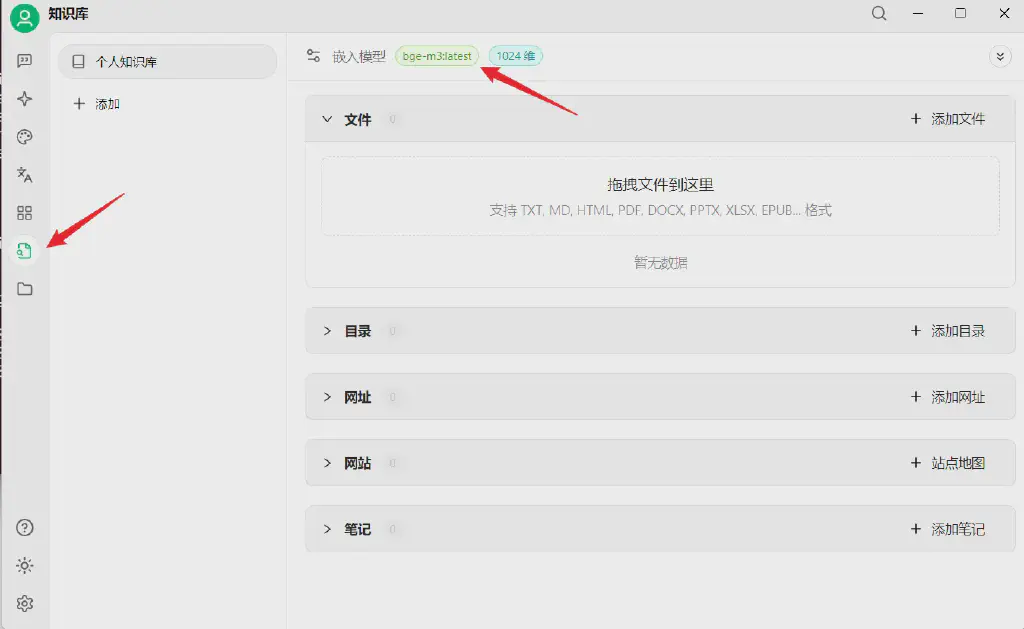
 Then you can use Cherry Studio’s knowledge base management to bring the local documents we want to add into the large model’s dataset. This includes methods such as adding files directly, specifying a directory directly, and collecting from websites, which is very convenient.
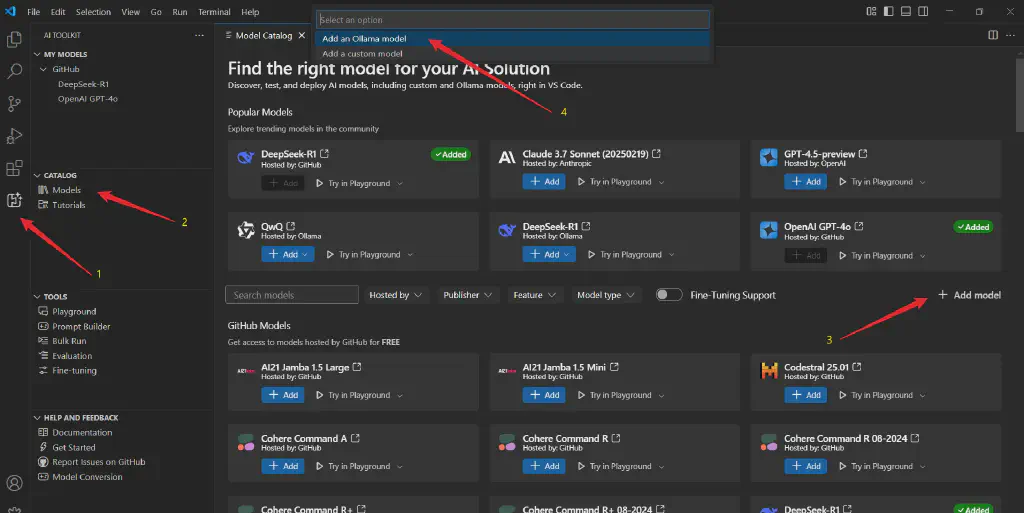
Integrating Local Deepseek into VS Code
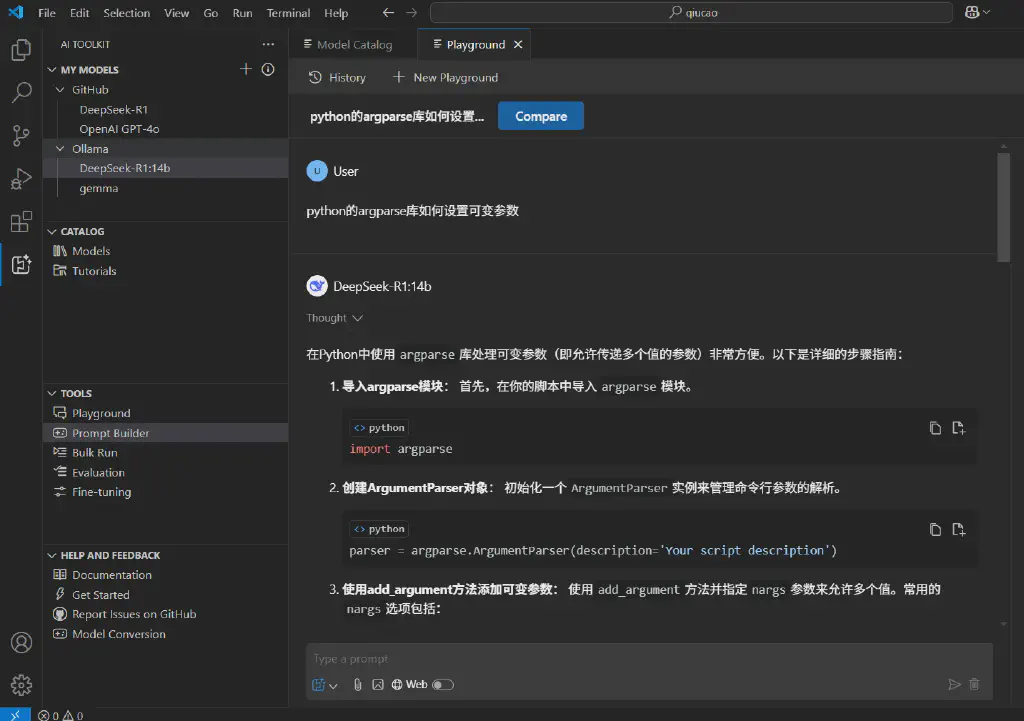
Once we have a local LLM, if we want to use it in VS Code, we can use VS Code’s AI Toolkit extension to add the local LLM as follows.
Test the capabilities of the local library in VS Code.
The above is our hands-on sharing of deploying local Deepseek.