Introduction
When getting started with test automation, record-and-playback is usually the first feature that novice testers reach for. And record-and-playback tools have always been a capability that every major Web automation testing solution inevitably emphasizes.
With early tools like WinRunner and QTP, test automation could be said to revolve entirely around record-and-playback. In recent years, Selenium also offers a recording tool, Selenium IDE, and Playwright includes a feature like codegen.
And these automated recording tools for Web pages are essentially all built by recording user actions as they operate the browser; at bottom, they are still implemented through browser-behavior recording.
In this article, what we want to introduce is a feature for test automation recording officially provided by the Chrome browser — namely, its Recorder.
How to Use Chrome Recorder
Chrome Recorder is a relatively new feature that Chrome has only provided since version 97, and many people may still be unfamiliar with it. But because it is a built-in browser feature, there is no need to install any additional tools, and it can also perform better in terms of the accuracy and ease of use of action recording.
Enabling It
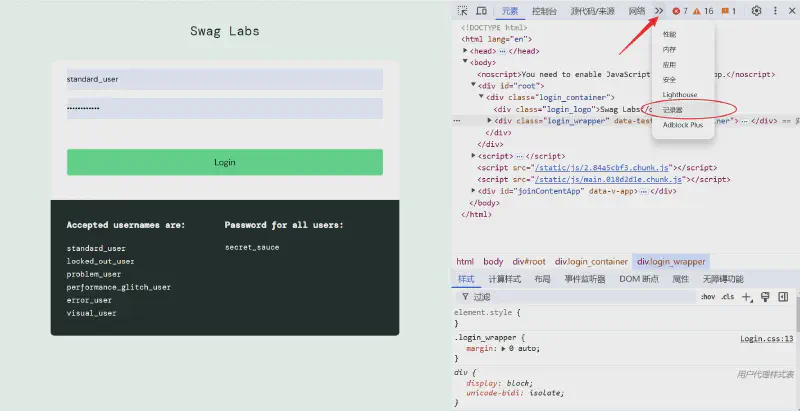
Open the Chrome browser’s Dev tool; if, among its feature tabs, you find a Recorder tab, that means the current browser already supports this recording feature.
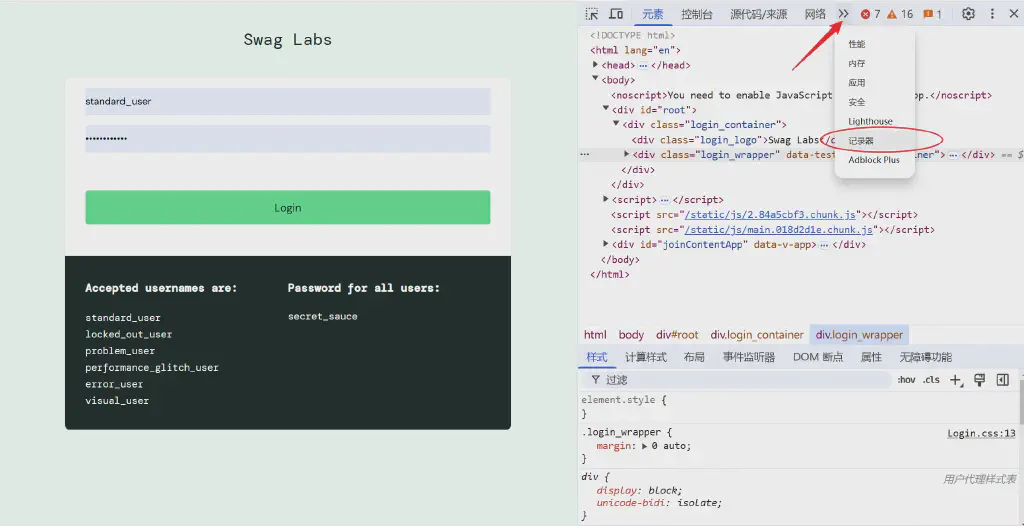
Go into Recorder and click Create new recording to start a script recording.
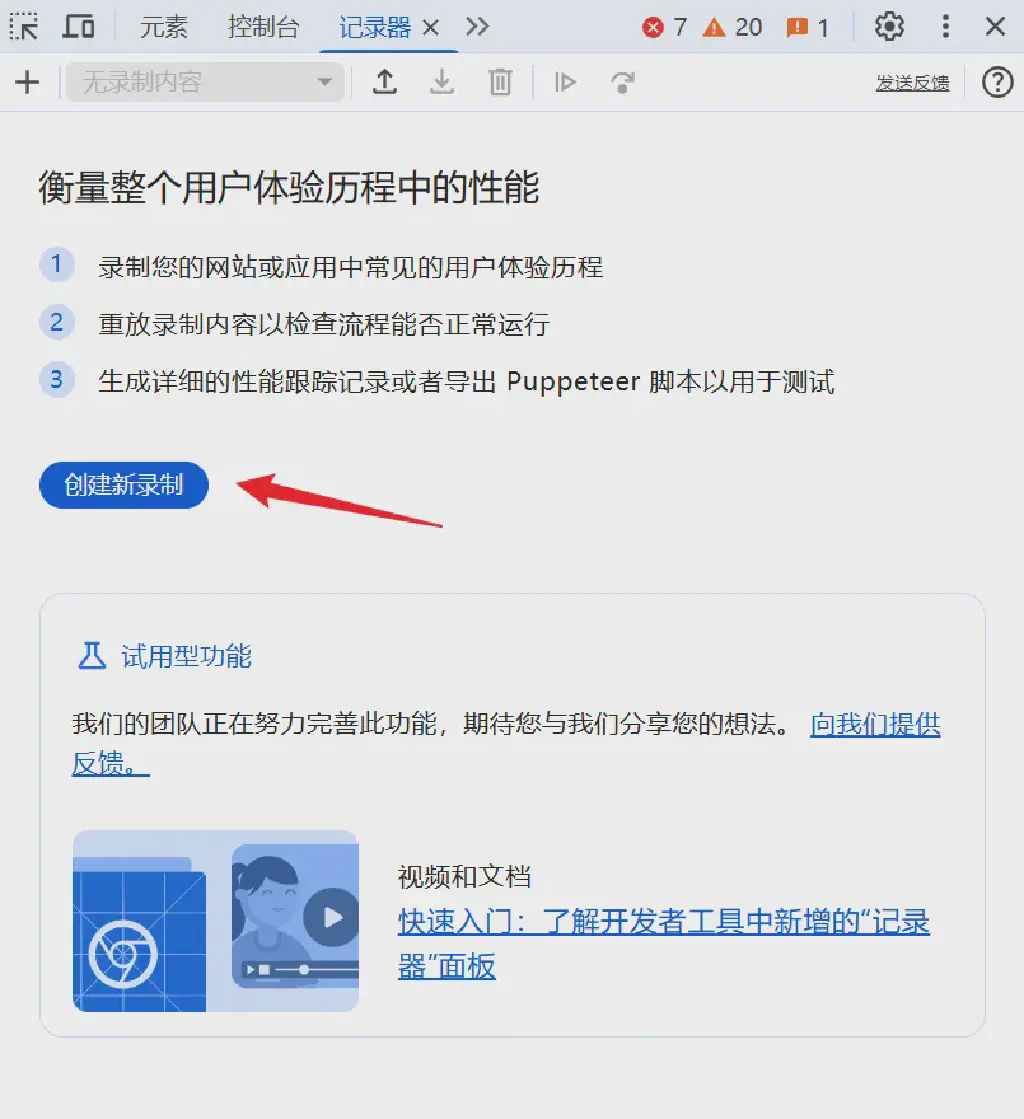
Make some recording settings, including the name of the current recording and the preferred means of element identification. Here, Selector attribute is usually based on test automation best practices: projects generally include an attribute for testing on page elements (commonly something like date-testid). For example, the SauceDemo.com site used in our example here also includes a test id attribute — in this case data-test — so you can specify it here. Then click Start recording to launch the recording.
Recording
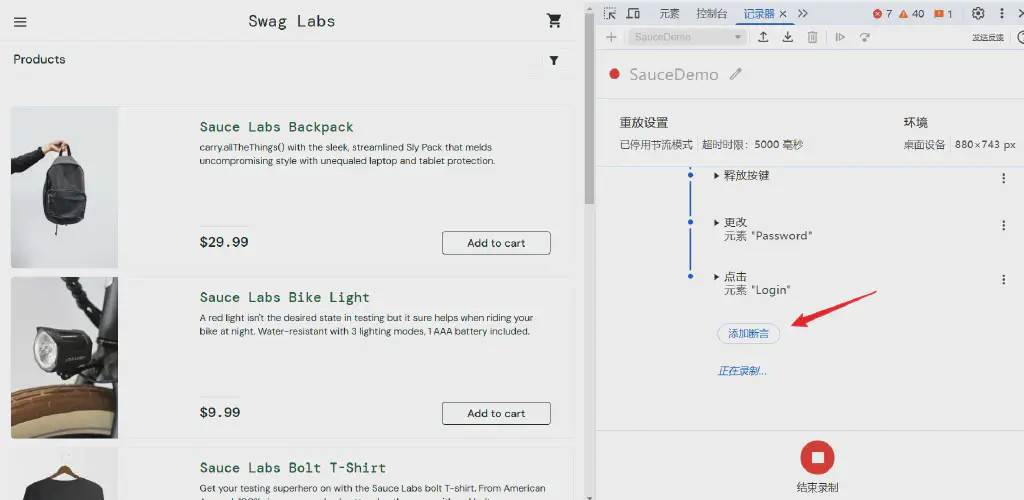
During recording, we simply perform page operations as usual and the recorder automatically logs our actions. If, during recording, we need to add some checkpoints, we can choose Add assertion in the recording tree; the default is the Wait for element check.
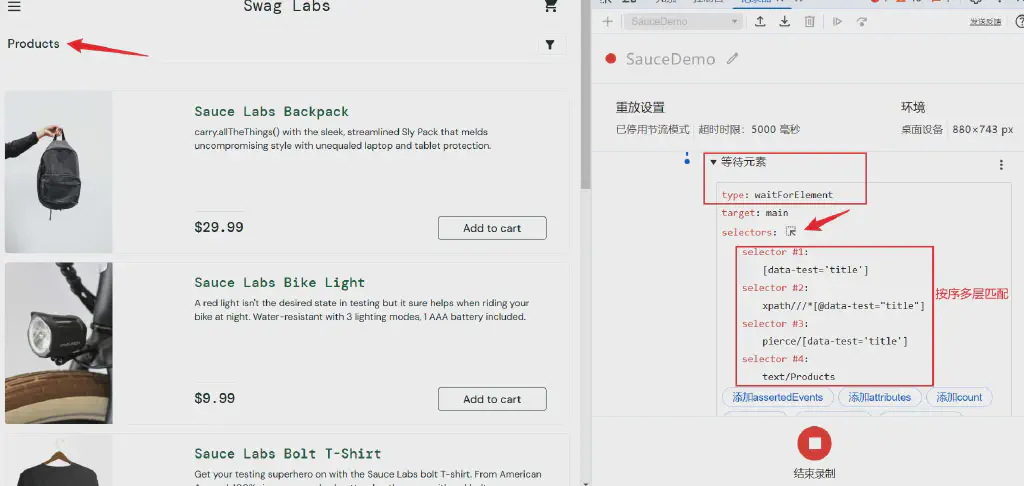
Select the selector here under selectors, then click in the page on the element we want to verify appears, and the corresponding element attributes are automatically added as a checkpoint. One nice thing here is that the recorder automatically adds multiple ways of describing the element; during actual playback, it matches them in sequence, providing better flexibility for adapting the recorded script.
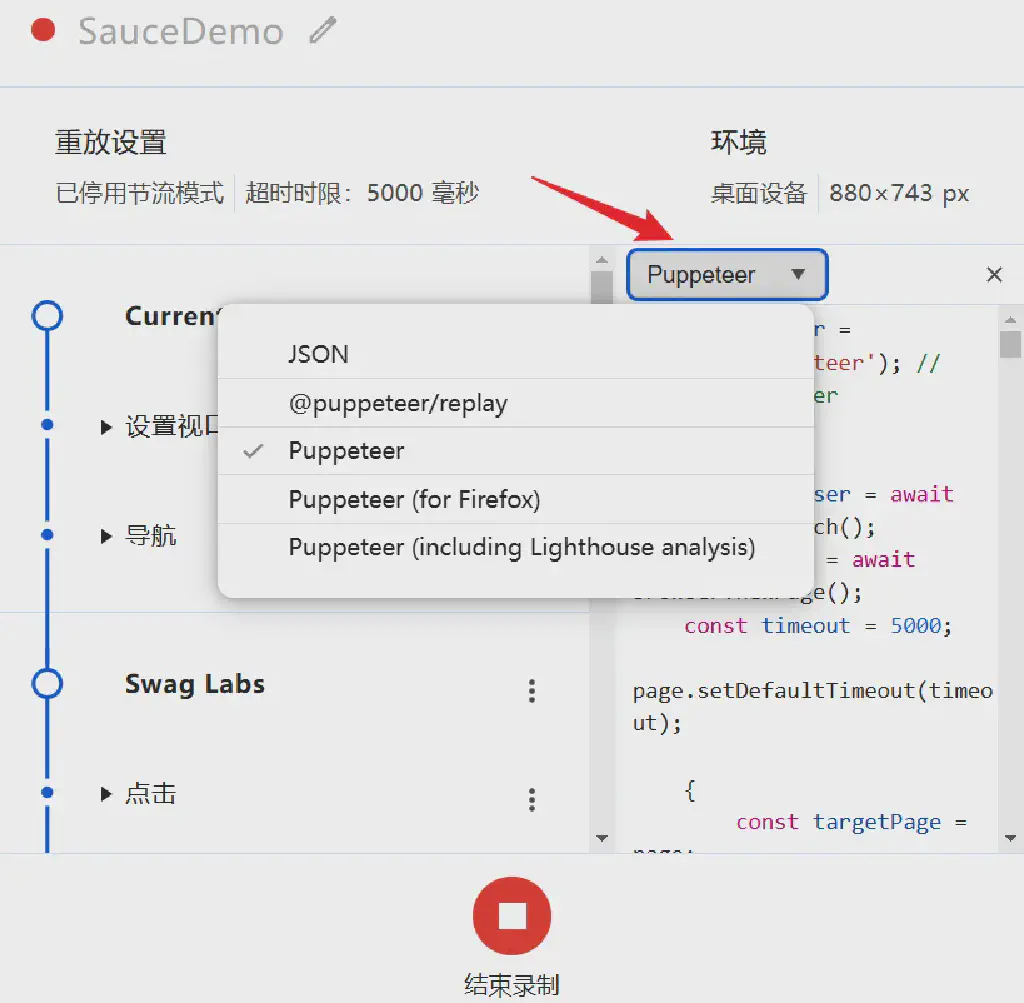
On the right side of the action recording tree, we can also click Show code, which automatically renders the action log as a test automation script. Currently, the script types supported here are mainly Google’s own puppeteer, but the official introduction also mentions that more tool types are planned to be added.
Click End recording and you have completed the generation of a simple script.
Playback
After recording is complete, you can of course also play it back right here — click Replay to run the playback test.
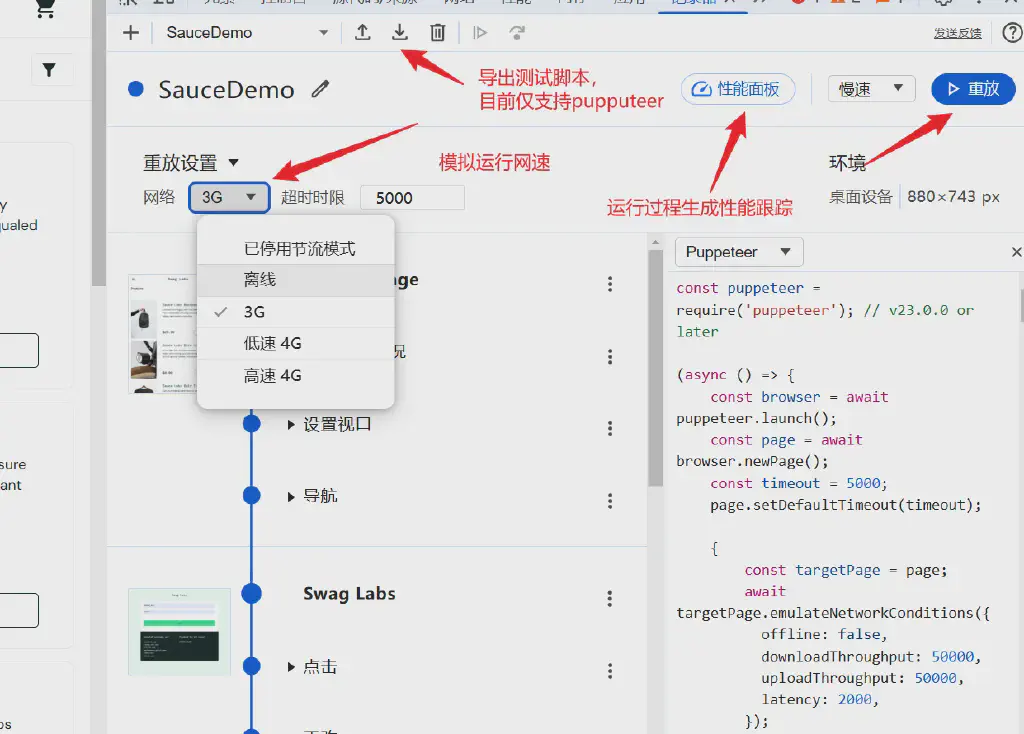
In Replay settings here, we can also simulate specified network conditions for the playback test, such as 3G, Slow 4G, and so on. During playback, the performance panel can also generate a front-end interaction performance report of the run (which will be generated into the Performance page).
You can also, of course, use the Export feature to directly export the recorded content as a puppeteer script and use puppeteer to carry out the automated execution.
Script Editing
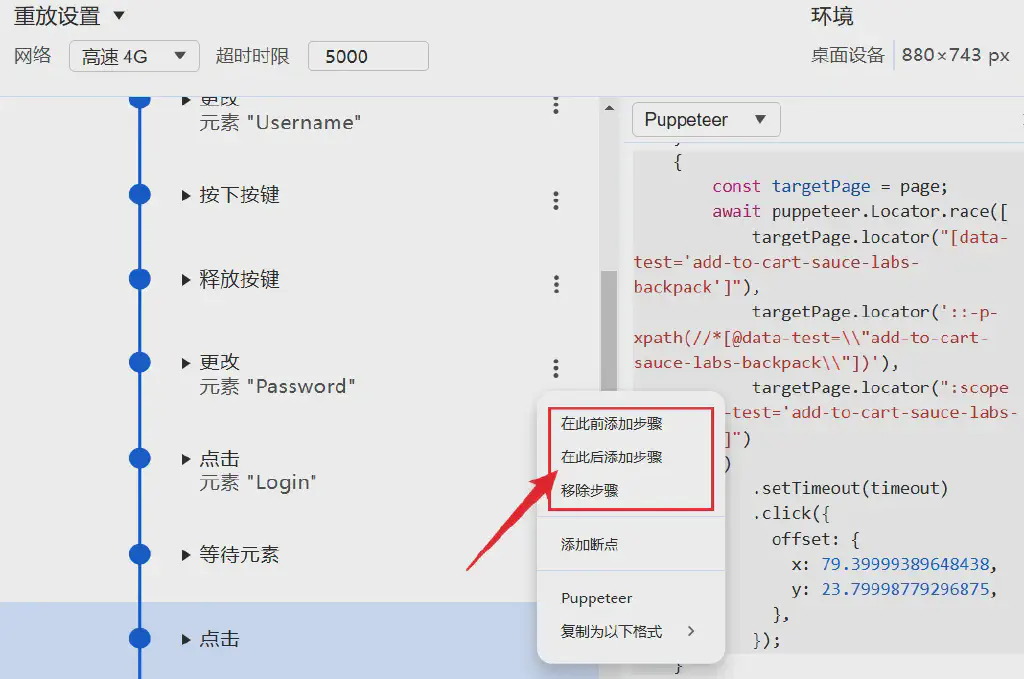
Besides generating steps through recording, we can also manually add and edit steps before or after the corresponding steps.
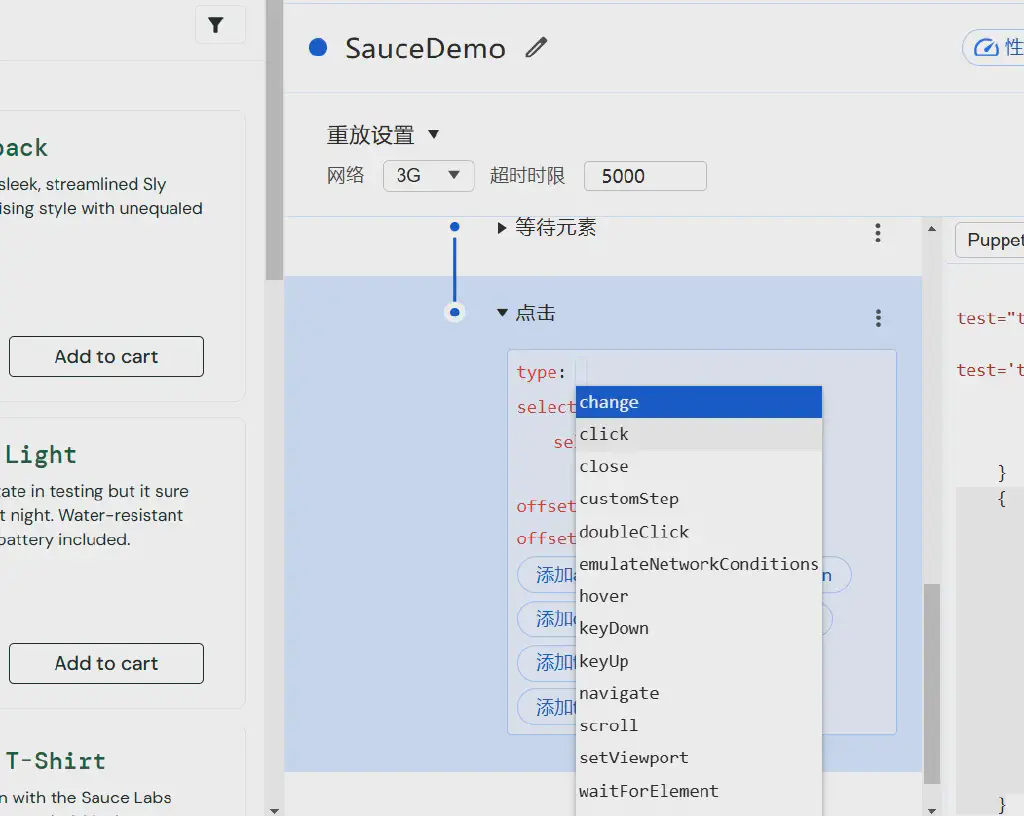
Specify the operation type, and you can see that it includes the various operation events from page interactions; then, by setting the element selector and related attributes, you can also manually edit the step’s behavior.
Conclusion
As we can see, with recorder, this built-in Chrome recorder, we can already complete the recording and generation of Web page automation scripts very conveniently and flexibly. Compared with Selenium IDE and Playwright codegen, because it is built into Chrome itself, it offers better flexibility and accuracy. Its main shortcoming is that, at present, support for test scripts is still mainly for Google’s puppeteer; for teams that do not use puppeteer as their primary tool, there may still be work needed to convert puppeteer scripts to other tools.