Preface
Test automation has evolved to the point where all kinds of test automation tools keep emerging one after another. Selenium is undoubtedly the standout among them: from 2016 to the present, it has consistently held the top spot as the most popular tool in global rankings of test automation tools. Built on the WebDriver protocol, Selenium is free, open source, powerful, and highly extensible, and thanks to the strong backing of its creator, the well-known consulting firm ThoughtWorks, it has seen widespread adoption across the industry.
However, in the Technology Radar (a guide to analyzing global technology trends) published by ThoughtWorks several years ago, the E2E (end-to-end testing) section pointed out a number of rising stars of the post-Selenium era, with Puppeteer singled out for particular attention.
We keep receiving positive feedback on “post-Selenium” web UI testing tools such as Cypress, TestCafe and Puppeteer.
…
We have good experience using “post-Selenium” web UI testing tools such as Cypress, TestCafe and Puppeteer.
…
Although Selenium is ThoughtWorks’ own product, as front-end technologies have advanced, Selenium has also shown drawbacks such as a heavy dependence on the browser, limited control over single-page applications, and the low communication efficiency of the WebDriver protocol, so a new generation of testing tools has gradually come into the industry’s view. In this article, let’s take a look at the first of these three tools: Puppeteer
A Brief Introduction to Puppeteer
Before introducing Puppeteer, let’s first cover some background: headless, that is, a headless browser. Long ago, the need for headless browsers already existed in the fields of front-end testing and web scraping — that is, driving the browser engine purely through code, without a browser interface. It is especially useful in UI test automation and in scenarios where browsing operations need to be completed silently. At the time, the most popular open source headless tool was PhantomJS, but after Google open-sourced Puppeteer, PhantomJS has now been discontinued, and it is fair to say that Puppeteer is the most widely used headless solution today.
So is Puppeteer itself a headless browser? The official project gives Puppeteer a concise definition:
Puppeteer is a Node library which provides a high-level API to control Chrome or Chromium over the DevTools Protocol. Puppeteer runs headless by default, but can be configured to run full (non-headless) Chrome or Chromium.
As we can see, Puppeteer is in fact a Node.js library built on the CDP protocol for controlling Chrome or Chromium. It is generally used in headless mode, but it can also work in standard mode.
- Puppeteer is a Node.js library, so the code must run in a Node environment
- It is based on the Chrome DevTools Protocol
- It can control only Chrome or Chromium
- The running mode is configurable
Puppeteer Architecture
The official Puppeteer architecture is shown below:
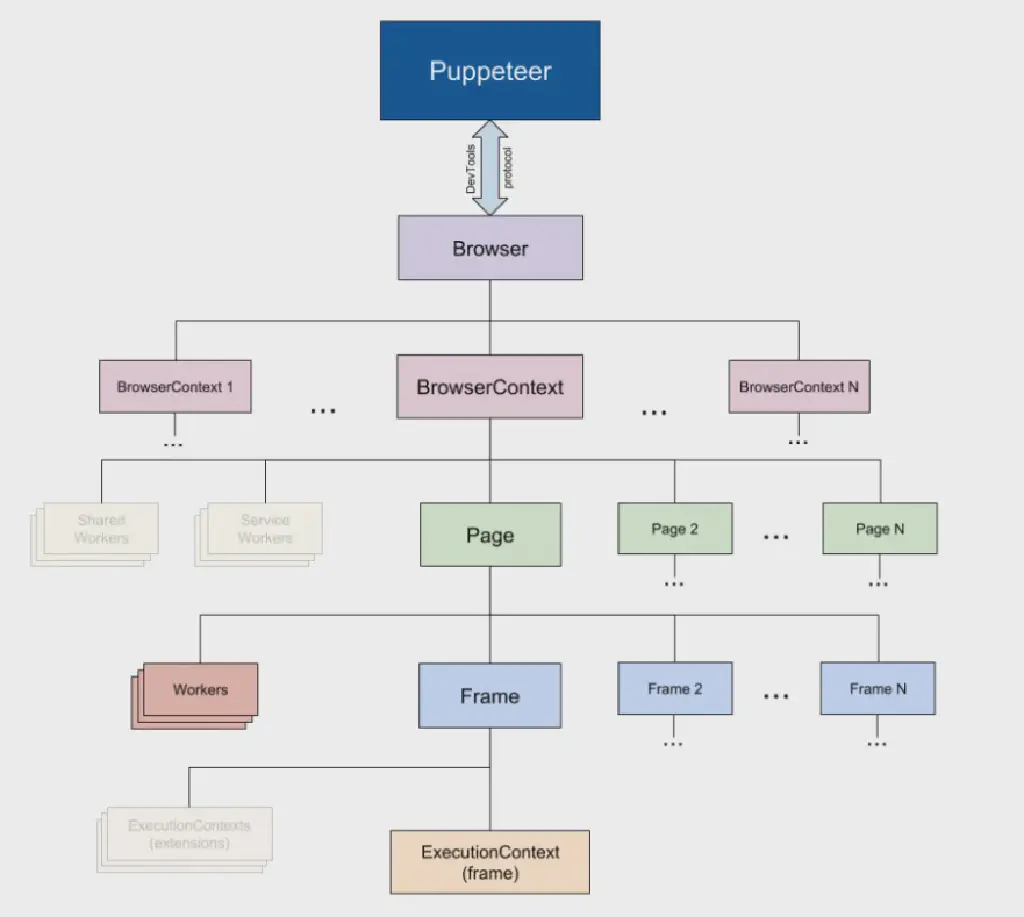
Notes:
- Puppeteer communicates with the Browser via the DevTools Protocol.
- A Browser instance can contain multiple browser contexts (BrowserContext).
- BrowserContext is used to hold browser sessions, and a single browser context can contain multiple pages.
- Page: at the very least, a Page contains one frame, the main frame; other frames may also exist, and these frames can be created with [iframe].
- Frame: at the very least, a Frame has one JavaScript execution context, namely the default execution context. A Frame may also have additional attached execution contexts.
- Worker: a Worker has a single execution context and can interoperate with WebWorkers.
Installing Puppeteer
Since Puppeteer is actually a Node library, installation is very simple:
| |
During installation, Chromium is downloaded as well, but for well-known reasons this download fails from within China. It is therefore recommended to install via a domestic mirror:
| |
After installation, you can use the following command to check the installed version and confirm the installation is correct:
| |
Hello World
Let’s look at the basic usage of Puppeteer through a simple example.
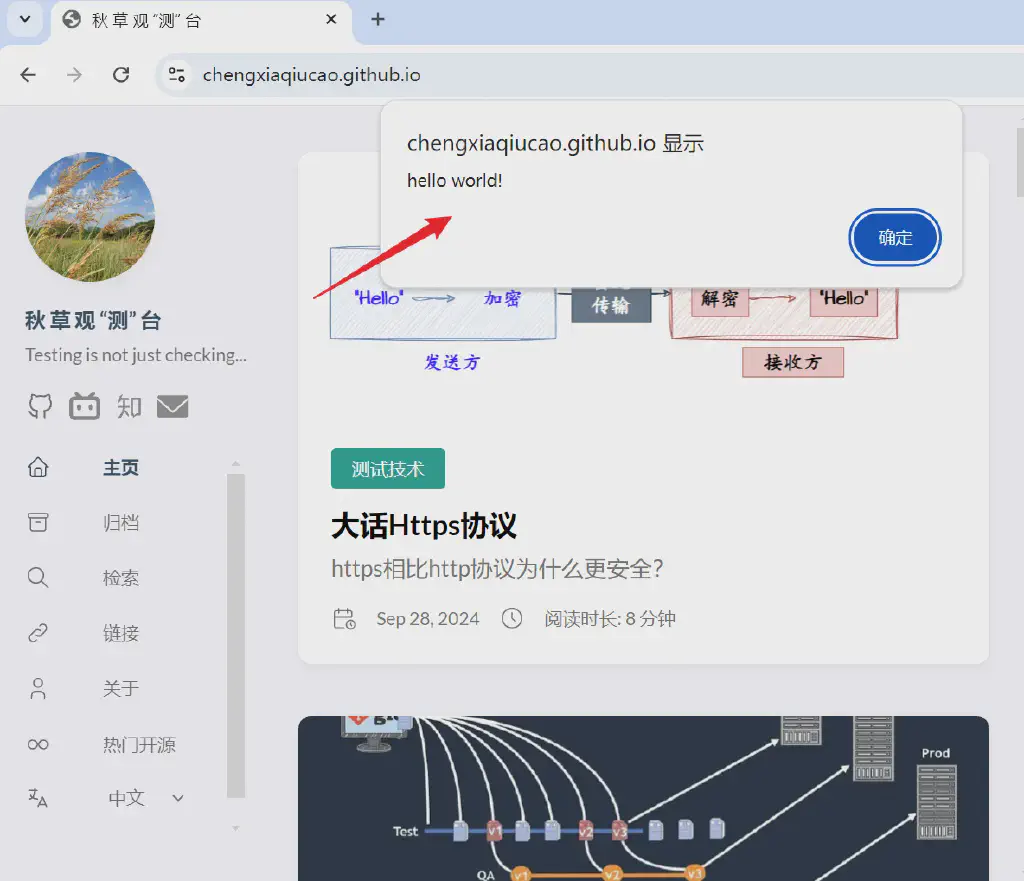
Because Puppeteer controls the browser directly over the CDP protocol, it can perform many direct operations at the browser level. For example, in the code below we drive the browser (in normal mode) to pop up a dialog when visiting my blog:
| |
The specifics of JavaScript syntax, such as the use of async, await, and arrow functions, won’t be covered in detail here; you can consult the relevant JavaScript documentation first.
Run this JavaScript file with Node.js to execute it.
node pupp_sample.js
Execution result:
Key Features of Puppeteer
The above is a simple Puppeteer example from which we can see its basic usage. In fact, as a powerful headless tool, Puppeteer offers many capabilities; the main ones are summarized below:
Configuring Browser Launch Parameters
In the method that launches the browser, we configure it by setting various parameters. The commonly used ones are:
headless: true/false — whether to launch in headless mode
devtools: true/false — whether to launch DevTools at the same time
slowMo: a value in milliseconds. When running in slow mode, the interval between each operation step
timeout: a value in milliseconds that sets the launch timeout; the default is 30000, i.e. 30 seconds
executablePath: lets you replace the default Chromium browser with an already installed Chrome browser; set the browser executable path here
args: sets configuration parameters supported by the Chrome browser. For the full list of supported parameters, see: Chrome Browser Parameters. For example,
args: ["--start-maximized"]makes the browser launch maximized by default.
Reusing the code above, let’s modify it slightly:
| |
When executed, it runs in slow mode, with DevTools open by default and the window automatically maximized.
Emulating Device Displays
Puppeteer also supports emulating mobile device displays. The page.emulate() method can emulate the interfaces of several mainstream mobile devices. For the full list of supported devices, see the official list
The usage is as follows:
| |
Execution result:
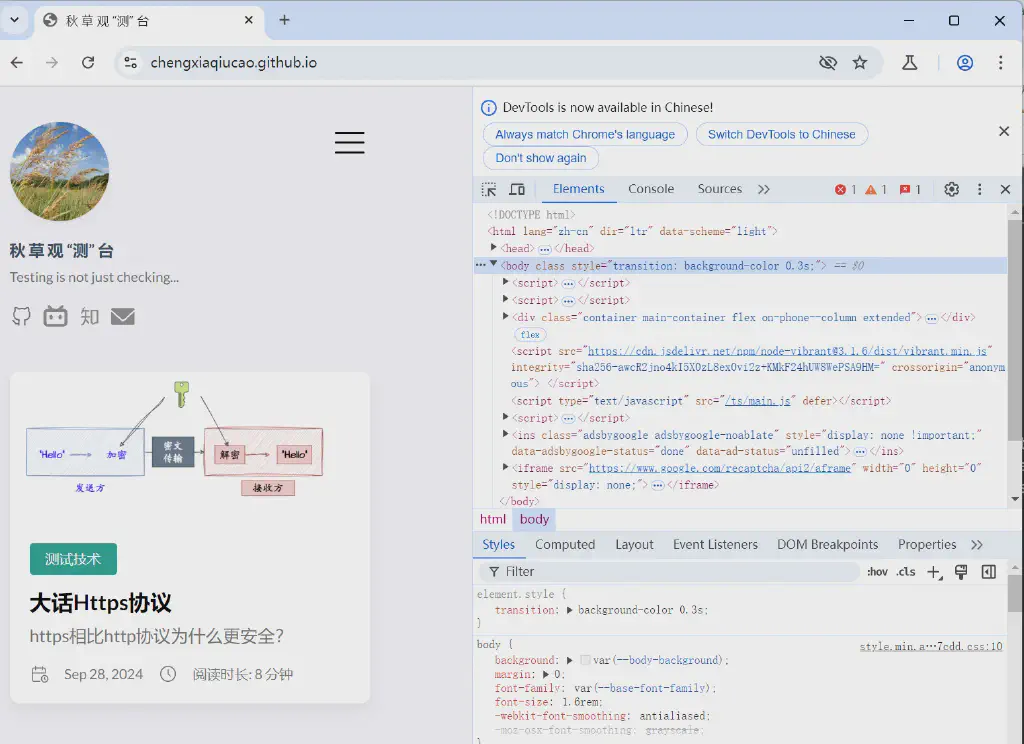
Besides the method for emulating terminal devices, you can also set the resolution with Page.setViewport. For example, the following statement sets the page to a 1920 * 1080 resolution:
| |
Locating Elements
As a tool for test automation, Puppeteer naturally needs to be able to identify the relevant elements on a page. In Puppeteer, elements can be obtained with page.$(selector) and page.$$(selector). The selector parameter uses CSS Selector syntax to locate elements. For CSS selector syntax, see: CSS selectors. For example, to locate the archive section on the blog page:
| |
Generally, to obtain the corresponding selector description for an element in Chrome, you can open Chrome DevTools, locate the element, and simply right-click to copy it.
Besides using a selector, elements can also be identified via an XPath path: page.$x(expression). For example:
| |
Page Operations and Keyboard Input
The most common operations in test automation are, naturally, driving the page to perform the relevant actions. In Puppeteer, you can use the corresponding ready-made methods to accomplish them.
| |
Getting Element Attributes
Sometimes we need to retrieve the attributes of an element on the page for subsequent operations. This can be done with page.$eval(selector, pageFunction), for example:
| |
Screenshots
Puppeteer can take page screenshots via the page.screenshot() method, which has a number of very useful parameters:
path: specifies the file path where the screenshot is saved
type: specifies the file type to save, jpg or png
quality: image quality, 0-100
fullpage: whether to save the complete page
clip: specifies the screenshot area {x, y, width, height}
omitBackground: removes the white background
encoding: image encoding, base64 or binary
Code example:
| |
Saving as PDF
Another Puppeteer feature is the ability to save a page directly as a PDF file:
| |
Intercepting Network Requests
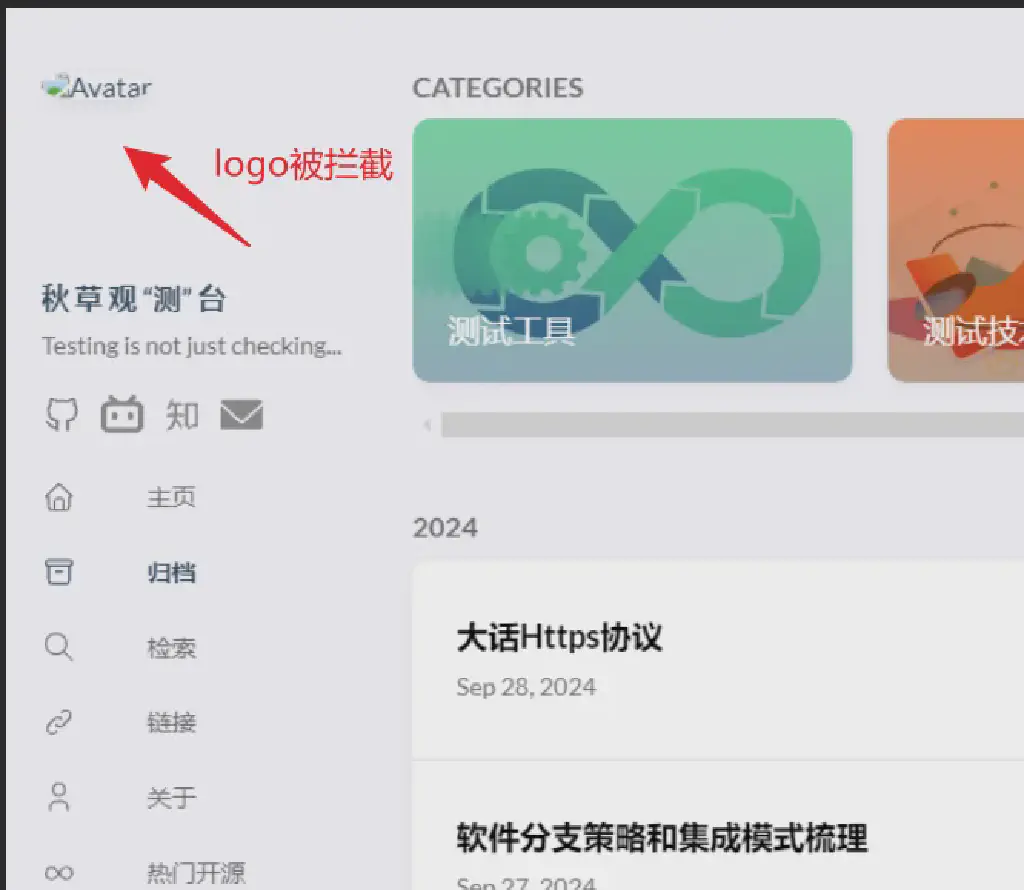
Puppeteer can intercept and handle a page’s network requests. The following example blocks the loading of the avatar image on the blog site:
| |
The result is shown below:
Recording Performance Metrics
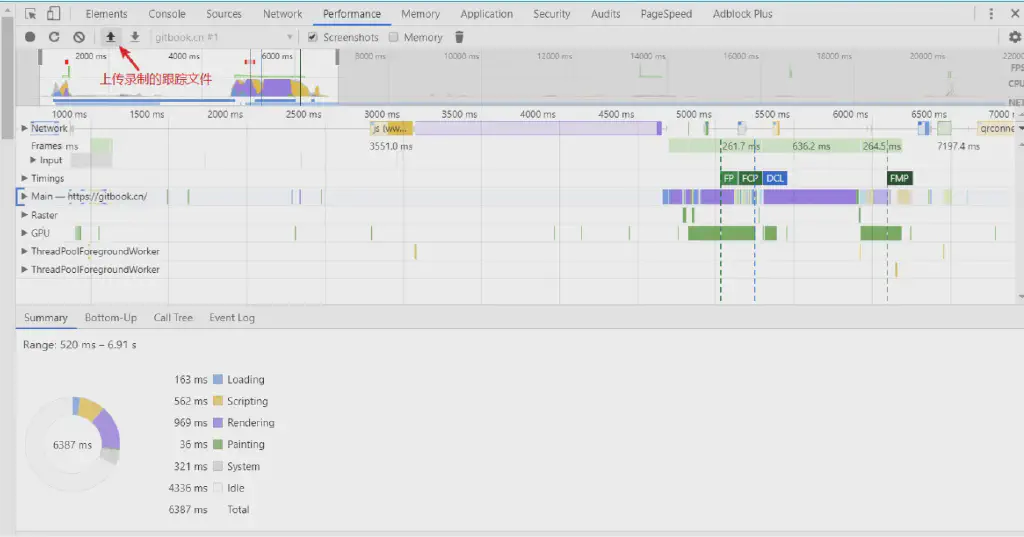
Another very useful Puppeteer feature is the ability to record performance tracing metrics so that they can be shared for performance analysis.
It is very simple to use: simply mark the operations around which you want to record performance metrics with page.tracing.start() and page.tracing.stop()
| |
Upload the saved trace.json file to the Performance panel in Chrome DevTools to carry out the corresponding performance analysis, as shown below:
A Test Automation Example Combining Puppeteer and Jest
Now let’s look at Puppeteer in action through a concrete UI test automation case.
The test requirements are as follows:
Case 1:
- Open the Qiucao Observation Station
- Confirm the site loads correctly
Case2:
- Locate the archive page
- Enter the archive section
Case3:
- Retrieve the article list on the current page and output it to the console
Puppeteer is a Node headless-browser control library and does not itself include any test framework functionality, so we generally rely on another test framework to handle test scheduling, execution, and assertions. Here we take Jest, a framework commonly used in front-end testing, as an example to see how Puppeteer can fulfill the automation requirements above.
Installing Jest and its basic usage are not the focus of this article, so I won’t go into detail here; feel free to search and learn about them on your own. A brief note follows;
| |
To use Jest, you need to configure package.json in the project directory with the following:
| |
By default, scripts ending in .test.js are automatically recognized as test scripts. Just drive execution with npm run test.
The specific implementation code is below; comments have been added at the key points, so no further explanation is needed.
| |
Execution output:
| |
Conclusion
The above is an introduction to the basic usage of Puppeteer. As we can see, Puppeteer, as a browser control library produced officially by Chrome, is powerful and can perform many control operations at the underlying browser level. Whether for UI automation or as a web scraper, it has plenty of uses. It runs directly on the Node.js environment and is simple to install and run. For E2E testing that targets the browser front end, Puppeteer is an excellent choice.
However, as a control library, Puppeteer is fairly limited when it comes to the framework side of test automation itself, and generally needs to be used together with other frameworks.
Follow Chengxia Qiucao, and you’ll never get lost in testing techniques~~