
In Python, the most basic way to develop command-line programs is to use the Python standard library argparse to define command-line arguments and various interactions. It is, however, relatively complex, and some common scenarios still need us to wrap them separately.
In this article we introduce another Python command-line tool library, typer, which is both very powerful and very easy to get started with, and see how to use it to help us quickly implement a command-line application.
Installation and Basic Usage
Installation
typer is a command-line implementation tool launched by the popular open source web API framework FastAPI. Like other Python third-party libraries, it is very easy to install.
pip instal typer
Basic Usage
Approach One
Write the most basic hello world program, user_typer.py
| |
Call it directly via the typer command
Run:
Demo>typer use_typer.py run
hello world!
Approach Two
You can also import typer in your code and then call it directly from within the program using its run method
| |
Run:
Demo>python use_typer.py
hello world!
Approach Three
Or declare the program as an application and use annotations to specify each command the application supports
| |
Run:
Demo>python use_typer.py
hello world!
Moreover, running python user_typer.py --help shows that the necessary help instructions have already been generated automatically.
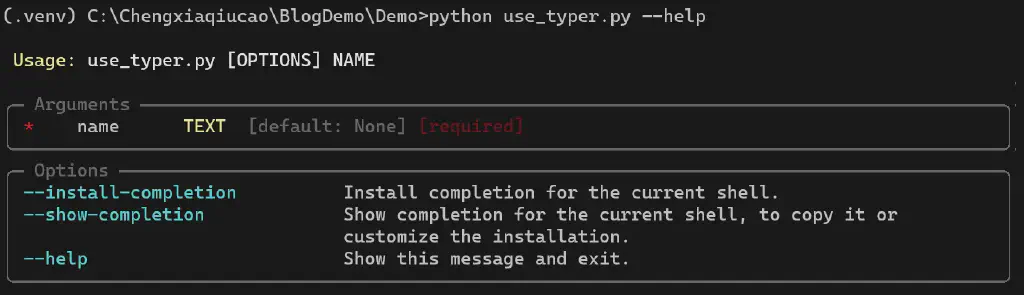
Here we added a parameter to the main function, and you can see that typer in fact also automatically parses the parameters carried by the corresponding function into command parameters, with no need to redefine them.
Command Help and Default Values
Of course, as a command-line program, defining command help information is an important part.
typer also provides a very convenient way to add help for commands and parameters.
For example, let’s add another command
| |
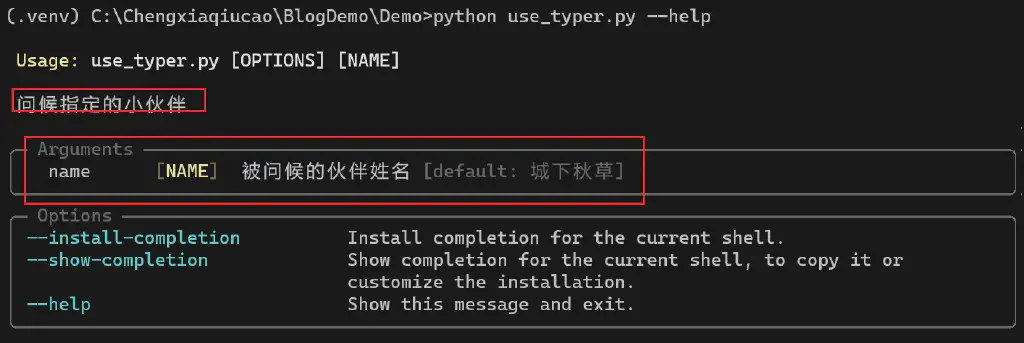
The help information for the command itself can be specified directly in the command annotation via the help parameter, or it can come from the function’s own docstring, which typer also parses as command help. But if it has already been specified in the command annotation, the help information specified in the command annotation takes precedence
For the specified parameter name, here it is specified through Python’s type extension library and then through the type.Argument help parameter, and at the same time the parameter’s default value can also be specified.
Optional Parameters and Parameter Names
The parameter we specified here through type.Argument is actually a required parameter. So what if we want a certain parameter to be optional? Here typer distinguishes them using two different types. By definition,
- typer.Argument is required
- typer.Option is optional
These correspond to the two different panels Arguments and Options in the help information. But whether it must actually be entered is determined by whether a default value has been specified for the corresponding parameter; if no default value is specified, it means this parameter must be entered.
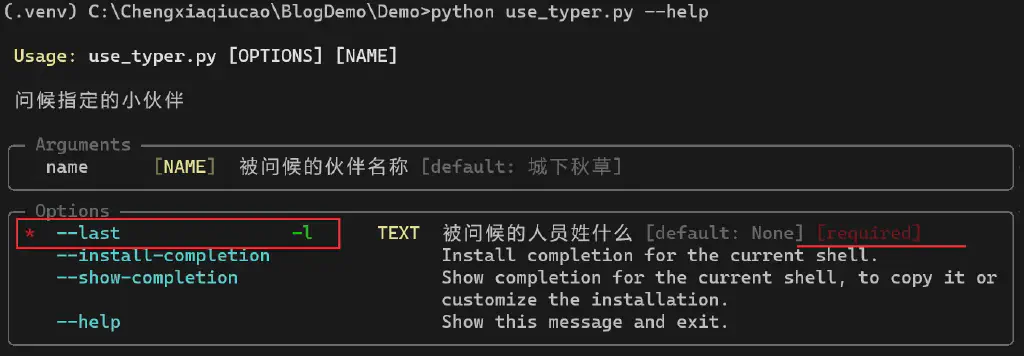
Another difference between Option and Argument is that an Option needs an option name specified, that is, a marker carrying -- or the short parameter marker -, such as --name, --help
By default typer.Option directly converts the parameter name into a long marker, and you can also specify other aliases yourself. At the same time you can also specify a short marker
For example, we can add another parameter last_name
| |
Richer Interface Enhancements
Besides being flexible and simple in parameter definition, typer also provides many enhancements for the interactive interface
Color and Structured Data Display Support
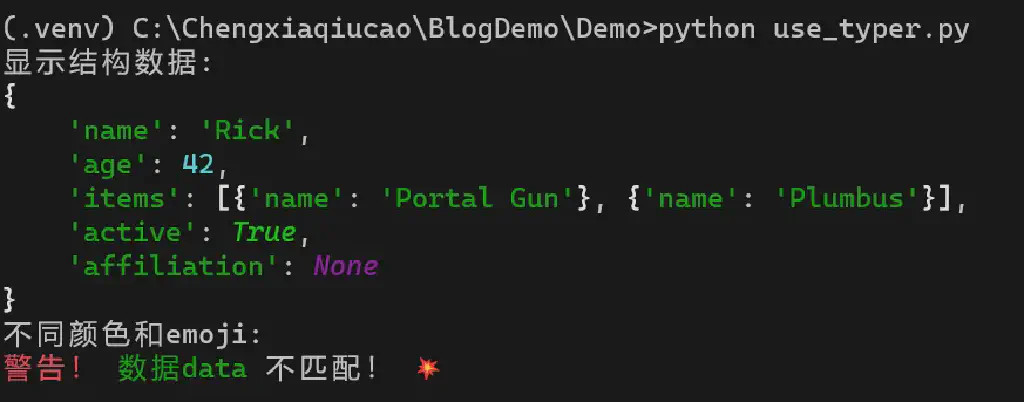
For example, for the command line, to distinguish information with different colors, here it uses another third-party library, rich; you can simply replace Python’s official plain print statement with the print method from the rich library to achieve richer color control and structured data display, and so on
| |
Execution effect
Prompt Messages
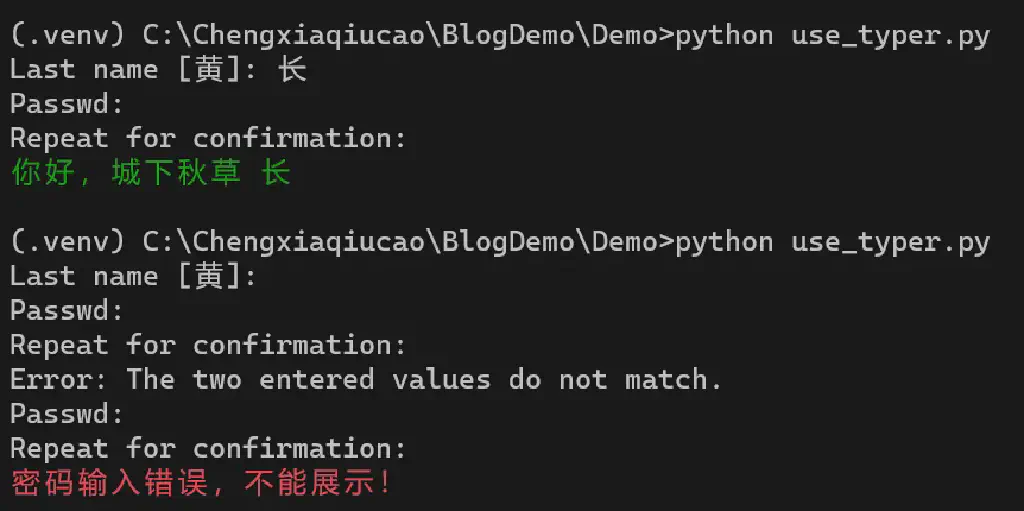
typer.Option can be switched to prompt mode, that is, for required parameters it can prompt for input
For example, in the above example, adding prompt=True will prompt for input when no parameter is entered
| |
Run:

Password and Information Hiding
For some password-type parameters, hiding and confirmation options are also supported. For example, let’s add a passwd parameter
| |
Progress Bar Implementation
typer also supports progress-bar-type information interaction quite conveniently, again using the progress enhancements in rich
| |

Multi-level Command Nesting
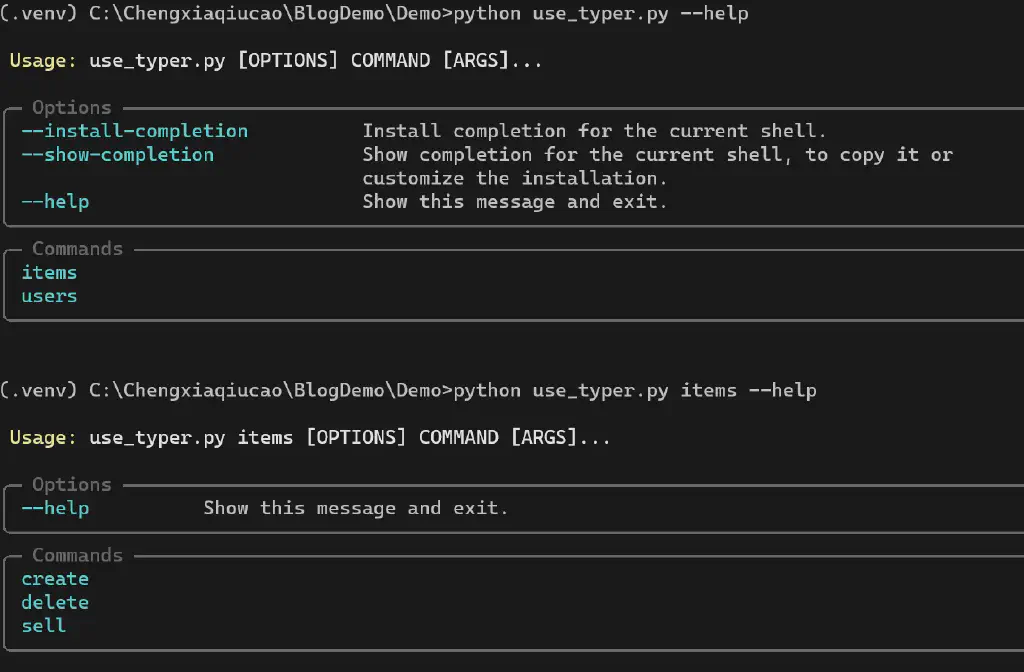
For multi-level command nesting, typer of course also provides good support. This is done by declaring different applications and then using the add_typer method to complete the hierarchical association.
The official example demonstrates this very clearly
| |
Use --help to see the effect of this arrangement
The above is a rundown of the usage of the command-line tool typer.