Introduction
In the previous article “Mastering Postman: Basic Guide”, we introduced the main features and basic usage of the Postman tool. As the most widely used API testing tool currently, besides providing a user-friendly UI interface and basic functions such as authentication, header, body settings, request submission and response parsing for HTTP protocol, Postman also provides very rich testing assistance capabilities. In this article, we will introduce Postman’s advanced scripting features in detail.
Postman Variables
In API testing tools, variables are of great significance for the reuse and flexible matching of API messages. As a professional API testing tool, support for variables is essential.
Postman provides rich variable support, defining 5 different types of variables with different scopes, making the use and management of variables more flexible and targeted. The following figure shows the official scope of different types of variables:
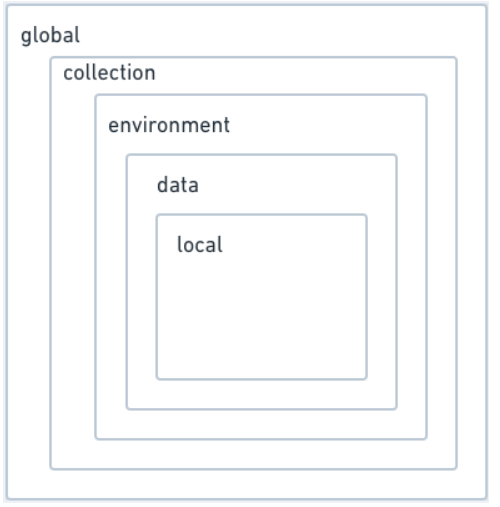
From outside to inside, the scope gradually becomes smaller, and at the same time, the priority becomes higher. That is, when there are variables with the same name, the variables of the inner layer type will take precedence. Let’s explain these variable types in detail with examples:
Global Variables
Global variables have the largest scope among all variable types. Once set, global variables can take effect in all places where variables can be used in the Postman tool.
Let’s look at how to set global variables in Postman:
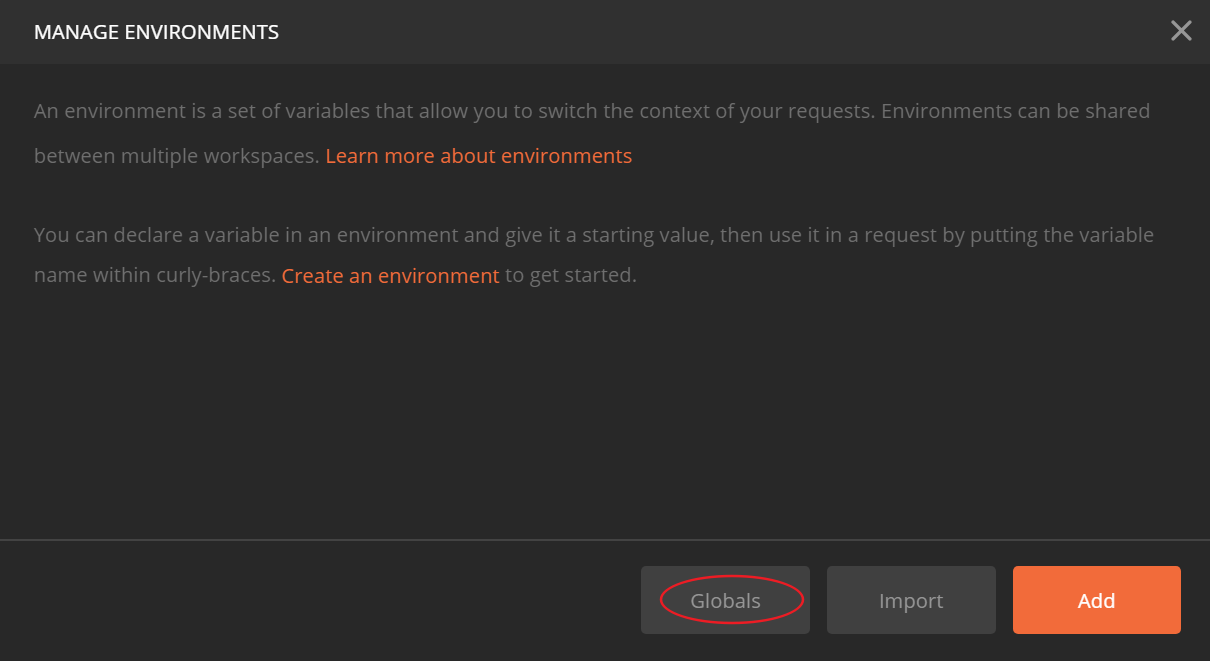
Open the environment management interface in the upper right corner of the tool:

Select global variable management:
Add Global variable:
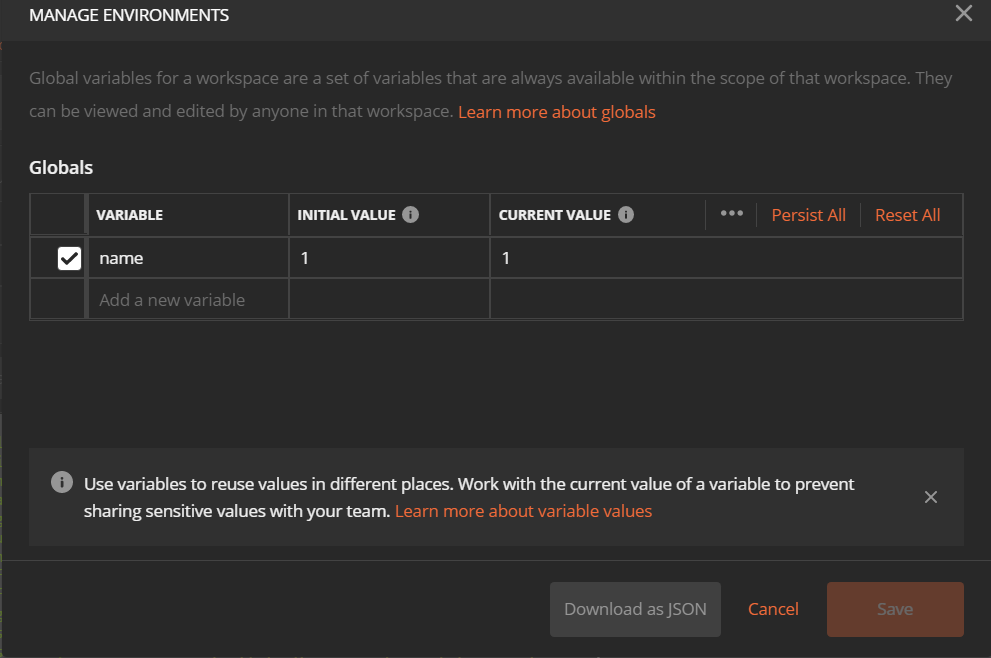
In this example, we set a global variable name with a value of 1. In Postman, variables are represented using double curly braces, like {{ variable }}. Taking the Github API as an example, let’s get the user information where the username is the value of the variable name.
After entering double curly braces in the URL, it will automatically suggest the variable types we need.

After sending the request, check the Postman response area, and you can see that we got the user information for username 1.
| |
Collection and Collection Variables
Let’s look at another variable type: Collection variables. First, let’s understand the concept of Collection. Collection is a grouping unit for organizing APIs in Postman, and Postman mainly uses Collection as a basic unit for configuration storage. We can think of Collection as the concept of a test suite in software testing.
Collection variables are variables with a scope on the Collection. These variables will only take effect on the Collection where the variable is set.
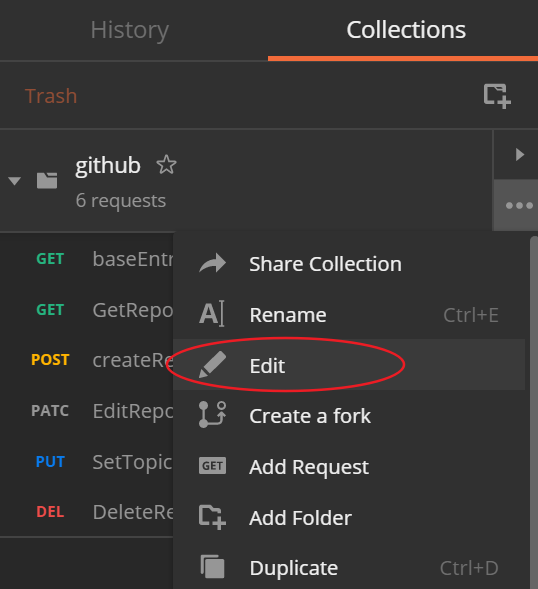
Setting method: Select Edit Collection
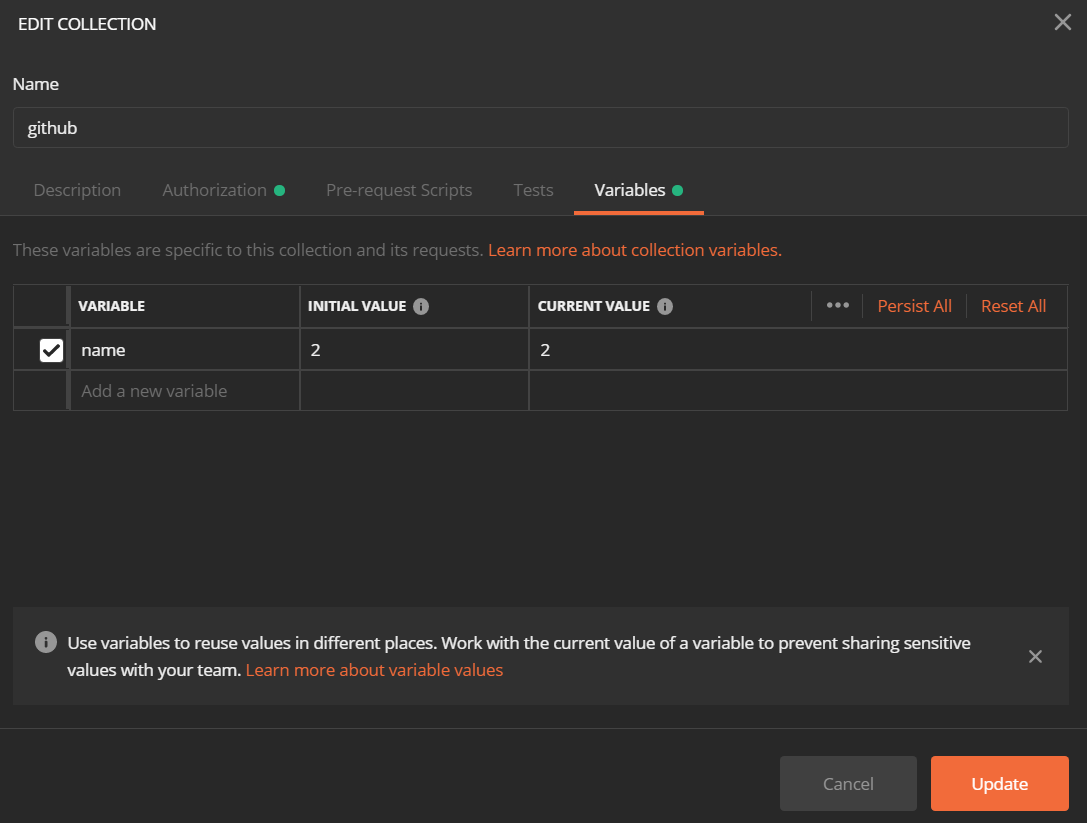
Add Collection variables in the variable page. In this example, we add a variable also named “name” to the Github Collection
Save the user retrieval API from the previous example to the Github Collection (we can create a sub-directory under the Collection, note that directories do not support setting directory-level variables, Collection variables will still take effect for APIs in sub-directories), and let’s submit this API again
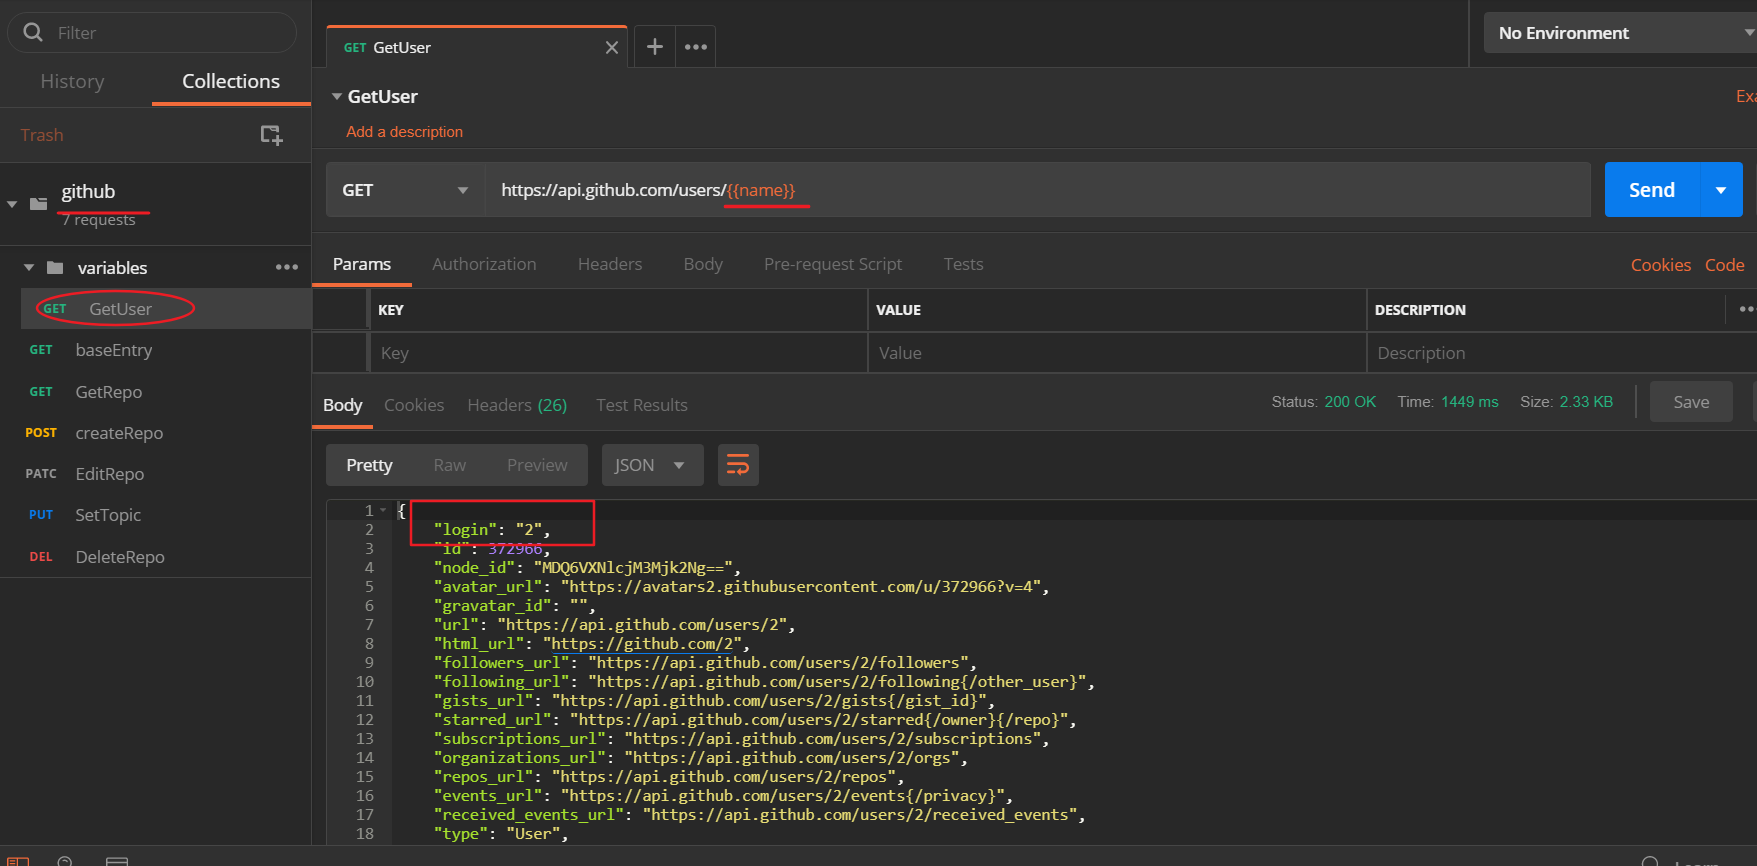
At this point, we can see that the Collection variable we set has taken effect, and we get the user information for name 2. Note that we still have a global variable name with a value of 1, and we can see that Collection variables have a higher priority than global variables.
Environment and Environment Variables
Environment is a very useful concept in Postman. Those who have done software testing understand that we encounter different software environments in our actual work, corresponding to different operating scenarios of our system under test. For example, a typical internet company may have the following different environments during development:
- Development environment
- Integration environment (joint debugging environment)
- System testing environment
- Pre-production environment
- Production environment
- Performance testing environment
- Security testing environment
Different environments often have significant differences in access methods, network topology, access permissions, and hardware configurations. Postman introduces the concept of Environment and manages a set of environment configurations through Environment variables, making it convenient for us to switch between different environments.
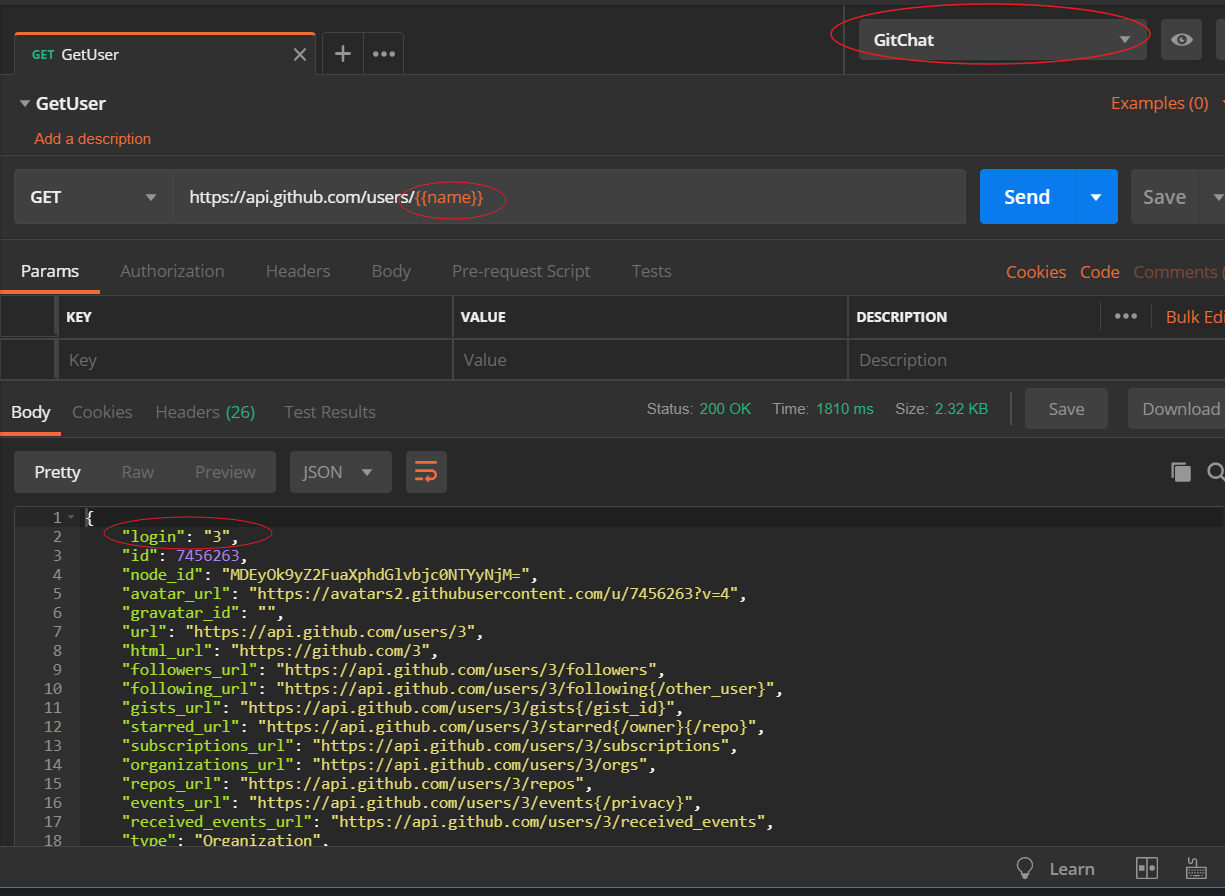
In the environment management interface, you can add environments and related variables for that environment. In this example, we add a GitChat environment and set an environment variable name = 3.
 After setting up the environment, on the user retrieval API interface, select the corresponding GitChat environment, and submit the request again. We can see that the environment variable has taken effect, retrieving user information for name 3, and similarly, we can see that the environment variable has a higher priority than the Collection variable.
Local Variables
Local variables are variables with the smallest scope, which only take effect in the current request. Local variables can be set in the pre-request script or test script of the request. Let’s look at an example:
In the pre-request script of the user retrieval API, we add the following code:
| |
This sets a local variable name = 4. After submitting the request, we can see that the local variable has taken effect, retrieving user information for name 4, and we can see that the local variable has the highest priority among all variable types.
Data Variables
Data variables are a special type of variable in Postman. They are not set directly like other variables but are used in conjunction with data files. This is very useful when we need to test the same API with different data.
Let’s look at how to use data variables: First, prepare a data file, which can be in CSV or JSON format. Here we use a CSV file as an example:
| |
Then in Postman, select Runner:
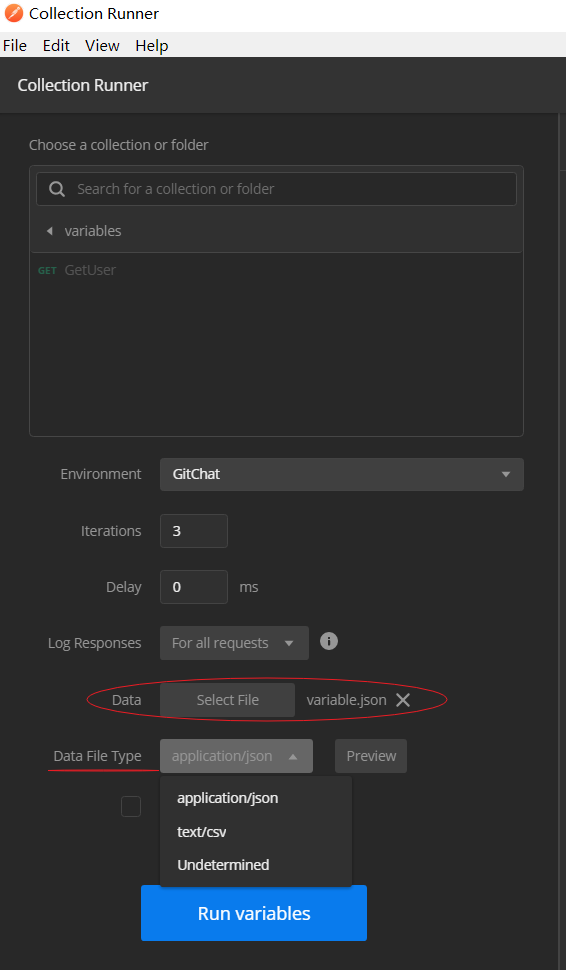
Select the Collection and API to run, and import the data file:
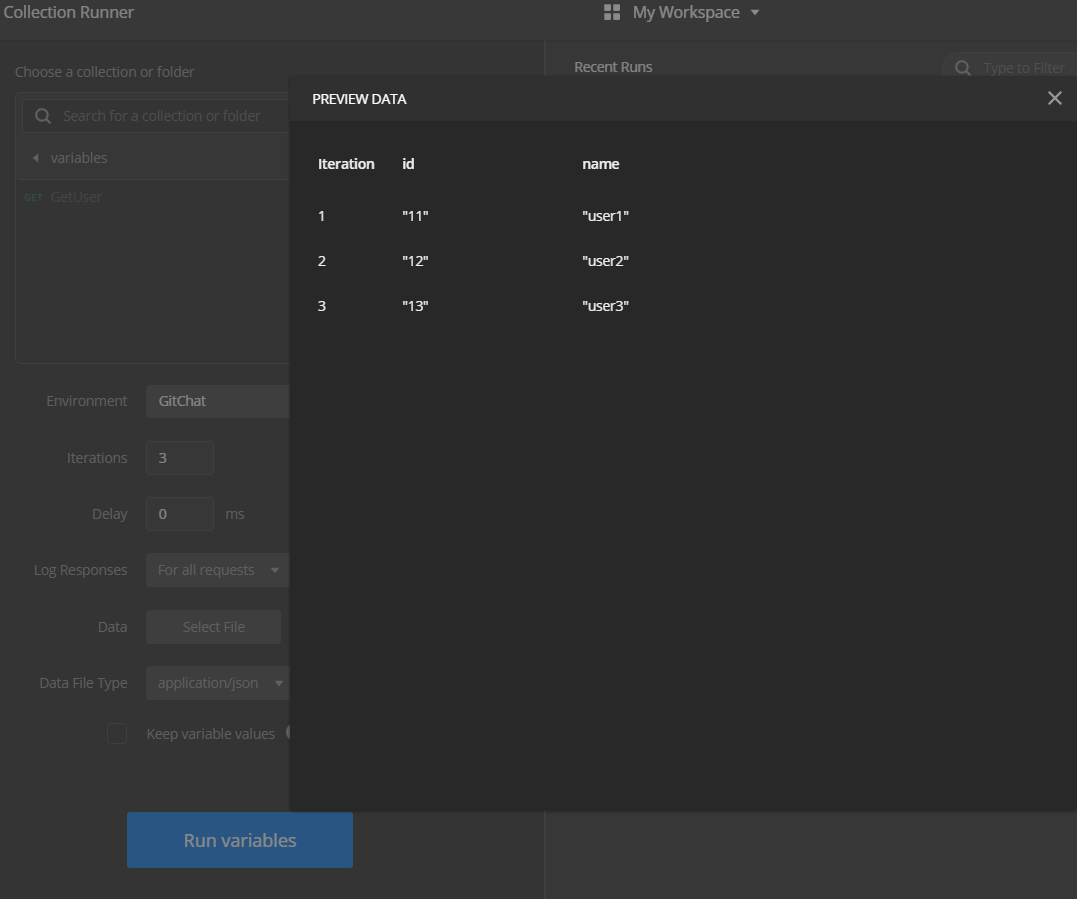
After clicking Run, Postman will automatically read the data from the data file and execute the API multiple times. Each time it will use a different row of data from the data file, and we can use these data through variables like {{name}} and {{age}}.
Dynamic Variables
In addition to the five types of variables mentioned above, Postman also provides some built-in dynamic variables that can be used directly without setting. These variables are mainly used to generate some random data or get the current time and other information. Here are some commonly used dynamic variables:
{{$guid}}: Generate a GUID{{$timestamp}}: Get the current timestamp (in seconds){{$randomInt}}: Generate a random integer{{$randomEmail}}: Generate a random email address{{$randomUserName}}: Generate a random username{{$randomAlphaNumeric}}: Generate a random alphanumeric string{{$randomColor}}: Generate a random color name{{$randomHexColor}}: Generate a random hexadecimal color code
For example, if we want to test an API that creates a user, we can use these dynamic variables to generate test data:
| |
Variable Scope and Priority
After understanding these different types of variables, let’s summarize their scope and priority:
Scope:
- Global variables: Effective throughout Postman
- Collection variables: Effective within the Collection
- Environment variables: Effective within the selected environment
- Local variables: Only effective in the current request
- Data variables: Effective during Collection Runner execution
Priority (from highest to lowest):
- Local variables
- Data variables
- Environment variables
- Collection variables
- Global variables
When variables with the same name exist in different scopes, the one with higher priority will take effect.
Postman Scripts
Postman provides powerful scripting capabilities, allowing us to perform various operations before and after requests. Postman scripts are written in JavaScript and can be used to set variables, perform tests, process response data, and more.
Pre-request Scripts
Pre-request scripts are executed before a request is sent. They can be used to set variables, perform authentication, or prepare data for the request. Let’s look at some examples:
- Setting variables:
| |
- Generating random data:
| |
- Performing authentication:
| |
Test Scripts
Test scripts are executed after a response is received. They can be used to verify the response, extract data from the response, or set variables for subsequent requests. Let’s look at some examples:
- Verifying response status:
| |
- Verifying response body:
| |
- Extracting data from the response:
| |
- Performing complex validations:
| |
Postman Console
Postman provides a console that can be used to view logs and debug scripts. You can open the console by clicking on the “Console” button in the bottom left corner of the Postman window, or by pressing the Alt+Ctrl+C (Windows/Linux) or Option+Command+C (Mac) keyboard shortcut.
In your scripts, you can use console.log() to output information to the console:
| |
This is very useful for debugging your scripts and understanding what’s happening during execution.
Postman Collection Runner
The Collection Runner is a powerful feature in Postman that allows you to run a collection of requests in a specific order. This is particularly useful for testing API workflows or running the same request with different data.
To use the Collection Runner:
- Click on the “Runner” button in the top left corner of the Postman window
- Select the collection or folder you want to run
- Configure the run settings (iterations, delay, data file, etc.)
- Click on the “Run” button
The Collection Runner will execute the requests in the specified order and display the results, including any test results.
Postman Newman
Newman is the command-line companion for Postman. It allows you to run and test a Postman collection directly from the command line. This is particularly useful for integrating Postman tests into your CI/CD pipeline.
To use Newman, you first need to install it via npm:
| |
Then you can run a collection using:
| |
Where collection.json is your exported Postman collection and environment.json is your exported Postman environment.
Newman also supports various options for customizing the run and generating reports:
| |
This command will run the collection and generate both CLI and HTML reports, with the HTML report saved to report.html.
Conclusion
In this article, we’ve explored the advanced features of Postman, including variables, scripts, the console, Collection Runner, and Newman. These features make Postman a powerful tool for API testing and development.
By mastering these features, you can:
- Create more flexible and reusable API tests
- Automate complex testing scenarios
- Validate API responses with detailed assertions
- Generate comprehensive test reports
- Integrate API testing into your CI/CD pipeline
In the next article, we’ll dive deeper into Postman’s automation capabilities and explore how to use Postman for API monitoring and documentation.