Introduction
This tutorial will combine the widely acclaimed and used RestAPI design exemplar, the Github API, to provide a detailed introduction to the usage methods and practical techniques of the Postman API testing tool.
Before starting this tutorial, let’s discuss why API testing is so important in the current software industry. Why should we learn Postman?
The modern software industry has evolved from the traditional World Wide Web to mobile internet, cloud computing, and now into the era of the Internet of Everything. Software and networks connect every aspect of our lives, with different devices and software systems interconnected in various ways. APIs serve as the bridge between different devices and systems, making them increasingly important in both current and future hardware and software industries.
What is an API?
The IT industry has evolved from the C/S and B/S architectures of the World Wide Web era, to the big frontend era of the mobile internet era, to the cloud architecture represented by IaaS (Infrastructure as a Service), PaaS (Platform as a Service), and SaaS (Software as a Service) in the cloud computing era, and now into the Internet of Things era where networks connect every aspect of our lives. The connection points that carry these connections are network interfaces. APIs are the entry points and bridges for connection, interaction, and mutual effect between different network applications.
As shown in the figure below, this is a diagram of the position of interfaces in a software system
 Here, UI interfaces and API interfaces represent user interaction interfaces and application programming interfaces respectively
API Testing
Now that we understand the concept of APIs, let’s look at what API testing is.
Here is the definition given by Baidu Encyclopedia:
API testing is a type of testing for interfaces between system components. API testing is mainly used to detect interaction points between external systems and the system, as well as between internal subsystems. The focus of testing is to check data exchange, transmission and control management processes, as well as the logical interdependencies between systems.
As we can see, after explaining the definition of interfaces, it clarifies that the focus of API testing includes the data interaction, processes, and the business logic behind them.
Looking further at the more commonly used definition of API testing, which Baidu has not included, we can look at the definition from Wiki:
API testing is a type of software testing that involves testing application programming interfaces (APIs) directly and as part of integration testing to determine if they meet expectations for functionality, reliability, performance, and security.[1] Since APIs lack a GUI, API testing is performed at the message layer.[2] API testing is now considered critical for automating testing because APIs now serve as the primary interface to application logic and because GUI tests are difficult to maintain with the short release cycles and frequent changes commonly used with Agile software development and DevOps.[3][4]
It is a type of integration testing that directly tests APIs, and Wiki categorizes API testing in the integration testing phase. This means it is more often implemented during system integration. It also clarifies that API testing is not purely functional testing, but also needs to consider reliability, security, performance, etc. API testing differs from GUI testing in that it is more reflected in the message layer, and due to the inherent disadvantages of GUI layer in automated testing, API automation is currently a key practice in the field of automated testing as well as in development models such as Agile and DevOps.
The figure below is the famous test pyramid, which layers software testing according to different test types. The bottom layer is unit testing aimed at the code level, the middle is service testing, and in today’s application services, services are more often manifested in API form, so service testing can also be understood as API testing. The top layer is GUI testing aimed at the user interface.
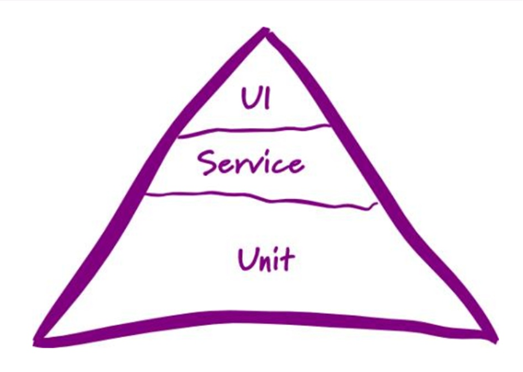
This model shows that in automated testing, the lower the layer of automated testing, the greater the proportion it should occupy for a better return on investment. The middle layer of API testing is neither as costly to maintain as the UI layer, making it difficult to keep up with rapid iterations, nor is it as capable of quality verification in business logic as unit testing. Therefore, API testing is now generally considered the priority choice for automated testing implementation.
HTTP Protocol Basics
Before formally introducing Postman’s functionality, we first need to introduce the testing object of Postman. Postman is primarily a testing tool for HTTP protocol interfaces, so this chapter will first introduce the basic knowledge of the HTTP protocol.
HTTP, or Hypertext Transfer Protocol, is one of the most widely used network protocols on the Internet. Currently, version 1.1 is mainly used, based on the TCP/IP communication protocol to transfer data (HTML, files, data, API interface messages, etc.)
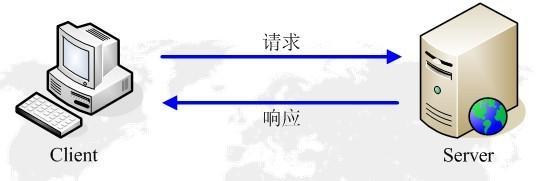
The HTTP protocol works on a client-server or C/S architecture
HTTP Message Composition
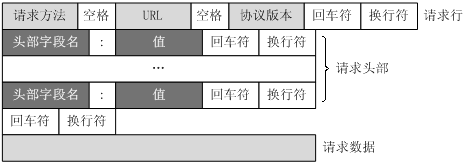
The client sends an HTTP request to the server, and the request message includes the following format:
Request line, request header, blank line, and request data are the four parts. As shown in the figure
Below is an example of a request to the Baidu homepage:
| |
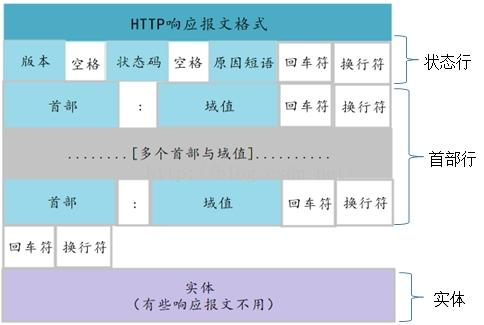
The server receives and processes the request sent by the client and returns an HTTP response message. It also consists of four parts:
Response status line, message header, blank line, and response body. As shown in the figure
Below is an example of the Baidu homepage response
| |
HTTP Methods
HTTP methods are key information carried in request messages, informing the server of the type of operation the request hopes to perform. Currently, in HTTP 1.1 version, the following methods are common
| No. | Method | Description |
|---|---|---|
| 1 | GET | Requests the specified page information and returns the entity body. |
| 2 | HEAD | Similar to a GET request, but the response does not contain specific content, used to obtain headers |
| 3 | POST | Submits data to the specified resource for processing (e.g., submitting a form or uploading a file). The data is included in the request body. POST requests may result in the creation of new resources and/or modification of existing resources. |
| 4 | PUT | Transfers data from the client to the server to replace the content of the specified document. |
| 5 | DELETE | Requests the server to delete the specified page. |
| 6 | CONNECT | Reserved in the HTTP/1.1 protocol for proxy servers that can change the connection to a tunnel method. |
| 7 | TRACE | Echoes back the received request, mainly used for testing or diagnosis. |
| 8 | PATCH | Transfers data from the client to the server to replace part of the content of the specified document. |
HTTP Status Codes
HTTP status codes define the result information of the server processing HTTP requests, mainly including the following five categories:
| Status Code | Description |
|---|---|
| 1XX | Received, pending processing |
| 2XX | Request processed successfully |
| 3XX | Redirect, resource location has changed |
| 4XX | Client request information error |
| 5XX | Server processing error |
1xx Informational
This type of status code represents that the request has been accepted and needs to be further processed. These responses are temporary, containing only the status line and some optional response header information, and ending with a blank line. Since no 1xx status codes are defined in the HTTP/1.0 protocol, servers are prohibited from sending 1xx responses to such clients except under certain experimental conditions.[4] These status codes represent informational responses, indicating other actions that the client should take.
2xx Success
This type of status code represents that the request has been successfully received, understood, and accepted by the server.
3xx Redirection
This class of status code indicates that further action needs to be taken by the client to complete the request. Typically, these status codes are used for redirection, with the subsequent request address (redirection target) specified in the Location field of this response.
4xx Client Error
This class of status code represents that the client appears to have made an error that prevents the server from processing. Unless the response is to a HEAD request, the server should return an entity describing the current error condition and whether it is a temporary or permanent condition. These status codes are applicable to any request method. Browsers should display any entity content contained in such error responses to the user.
5xx Server Error
Indicates that the server cannot complete a clearly valid request. This class of status codes represents that an error or exception has occurred in the server’s processing of the request, or that the server is aware that it cannot complete the processing of the request with the current software and hardware resources. Unless this is a HEAD request, the server should include an entity explaining the current error status and whether this condition is temporary or permanent. Browsers should display any entity included in the current response to the user. These status codes are applicable to any response method.
For a detailed list of status codes, please refer to the appendix
GitHub API
This tutorial will mainly use the Github API for practical introduction to APIs. This chapter will briefly introduce the Github website and Github API.
GitHub is a hosting platform for open source and private software projects. It is named GitHub because it only supports Git as the only version control format for hosting. It is also currently the world’s largest code hosting platform, which can be said to be the holy land of programmers, known as the world’s largest same-sex social platform :joy: (Github is sometimes intermittently inaccessible in China, you may need to use a VPN)
Main concepts in github
- Commit: Commit changes to the repository (local Git repository and GitHub repository are two different things).
- Commit message: Every time you commit, you need to provide a message describing what was done in this commit.
- Branch: Like a tree diagram, each independent branch is a version of the project, and branches can be merged with the master.
- Master branch: All Git projects create a default branch when initially created, which is the master branch. In development, when writing a new feature, a branch is first created, the feature is completed and tested on that branch, and after passing, the project leader merges that branch into the master.
- Feature branch: Not used much
- Release branch: If there is a manual QA (quality management) process, or if old versions of the software must be supported, a release branch is needed to store necessary patches and update records. There is no technical difference between feature branches and release branches, but they help distinguish categories when discussing within the team.
- Merge: Merge can combine all the content on one branch into another branch, generally merging a branch into the main branch.
- Tag: Commonly used to record release versions. When a version is released, a tag is given, so that the code of that version can be recorded when it was generated.
- Check out: Generally refers to viewing the operation records on a certain branch.
- Pull request: Generally used to pull code from a branch in a remote repository to the local, or to pull branch code from the local repository into the current project.
- Issue: GitHub’s feature for raising issues. Generally, when encountering problems, the problematic situation can be recorded through issues.
- Wiki: A lightweight way to create Web pages, where created Web pages can be linked to each other. Projects in GitHub typically use WIKIs for documentation.
- Clone: Download a copy from GitHub to the local, which can be pulled up after operation.
- Fork: A copies B’s project to their own account, modifies it and then submits it. B can see the content modified by A, but B’s original project will not have any changes.
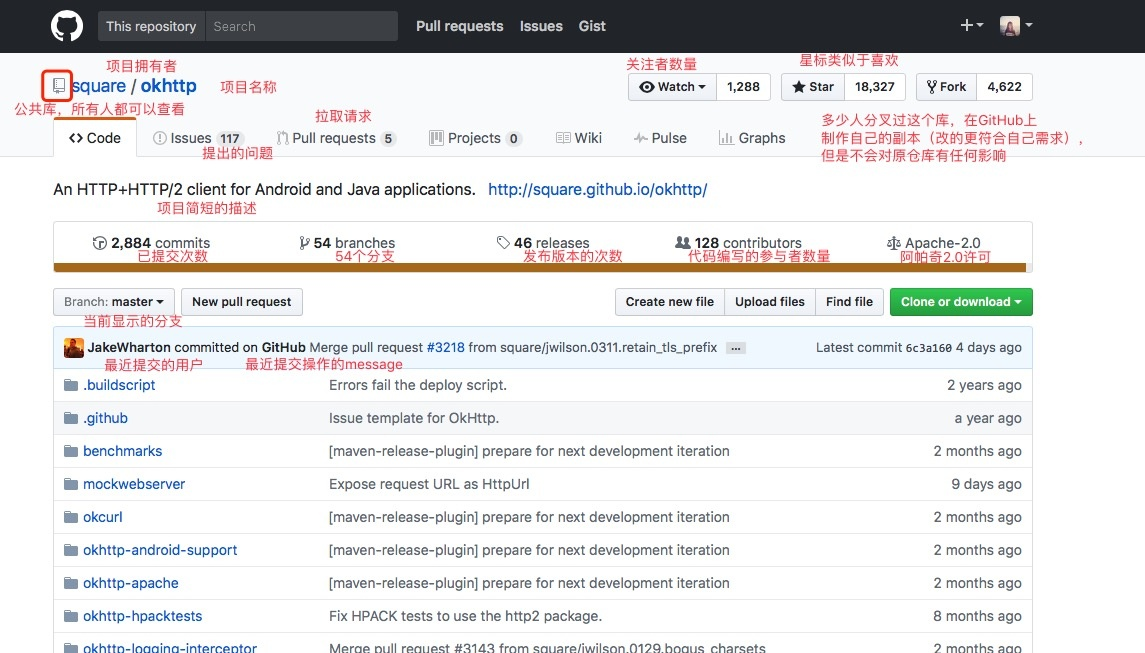
Github main interface functions
Github API
Currently, the latest V4 version of the Github API is based on GraphQL, but the commonly used one is still the V3 Restful API
Main resources and corresponding operations in github API
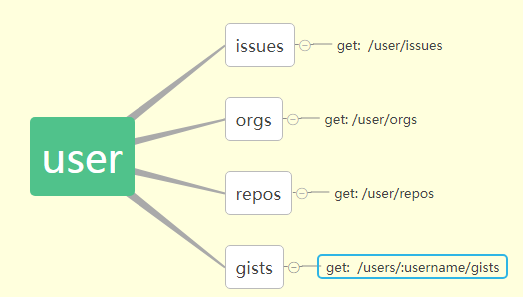
User resource
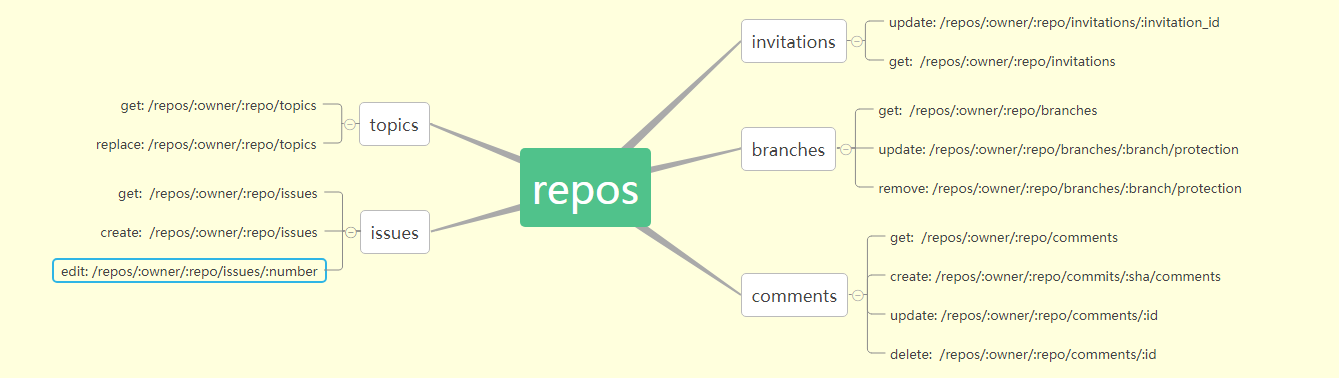
Repo operations
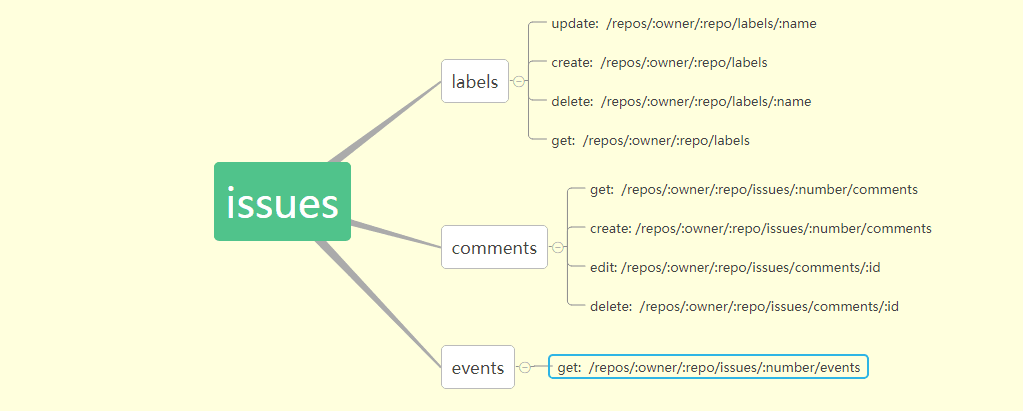
Issue operations
Images from the web
Time format in github
The time format in github is as follows:
YYYY-MM-DDTHH:MM:SSZ
Github rate limiting rules
To include server-side load pressure, github restricts request traffic. Each github response header carries github’s rate limiting settings.
| Header Parameter | Meaning |
|---|---|
| X-RateLimit-Limit | Current maximum request limit per hour, generally 60 times for unauthenticated requests, 5000 times for authenticated requests |
| X-RateLimit-Remaining | Current remaining number of requests |
| X-RateLimit-Reset | Remaining limit reset time, in milliseconds |
Request Parameters and Pagination
Parameters can be carried in requests, generally including two types of parameters: path parameters and query parameters

The github API supports two default pagination parameters:
- page: Current page number to display
- per_page: Number of results to display per page
Postman Basics
There are many testing tools that can be used for Rest API testing, common ones include soapUI, Jmeter, fiddler, etc., which are often used for API testing. However, currently the most popular and common tool among API testers is Postman, which we will introduce in this chapter.
Installing Postman
The earliest version of Postman, and for a long time, existed as a Chrome plugin. Many people even thought that postman was Google’s official tool plugin, and a large amount of the resources we can see now are based on the chrome plugin form for introduction.
But currently Postman has actually launched a standalone local App program, and the official has announced that it no longer supports the chrome plugin form. Although the plugin version can still be used now, compared to the Native version, it is limited by the functionality of the chrome browser, and many features are lacking in the plugin version, such as built-in support for cookies, proxy functionality, console functionality, etc. So the installation of the plugin version will not be introduced here.
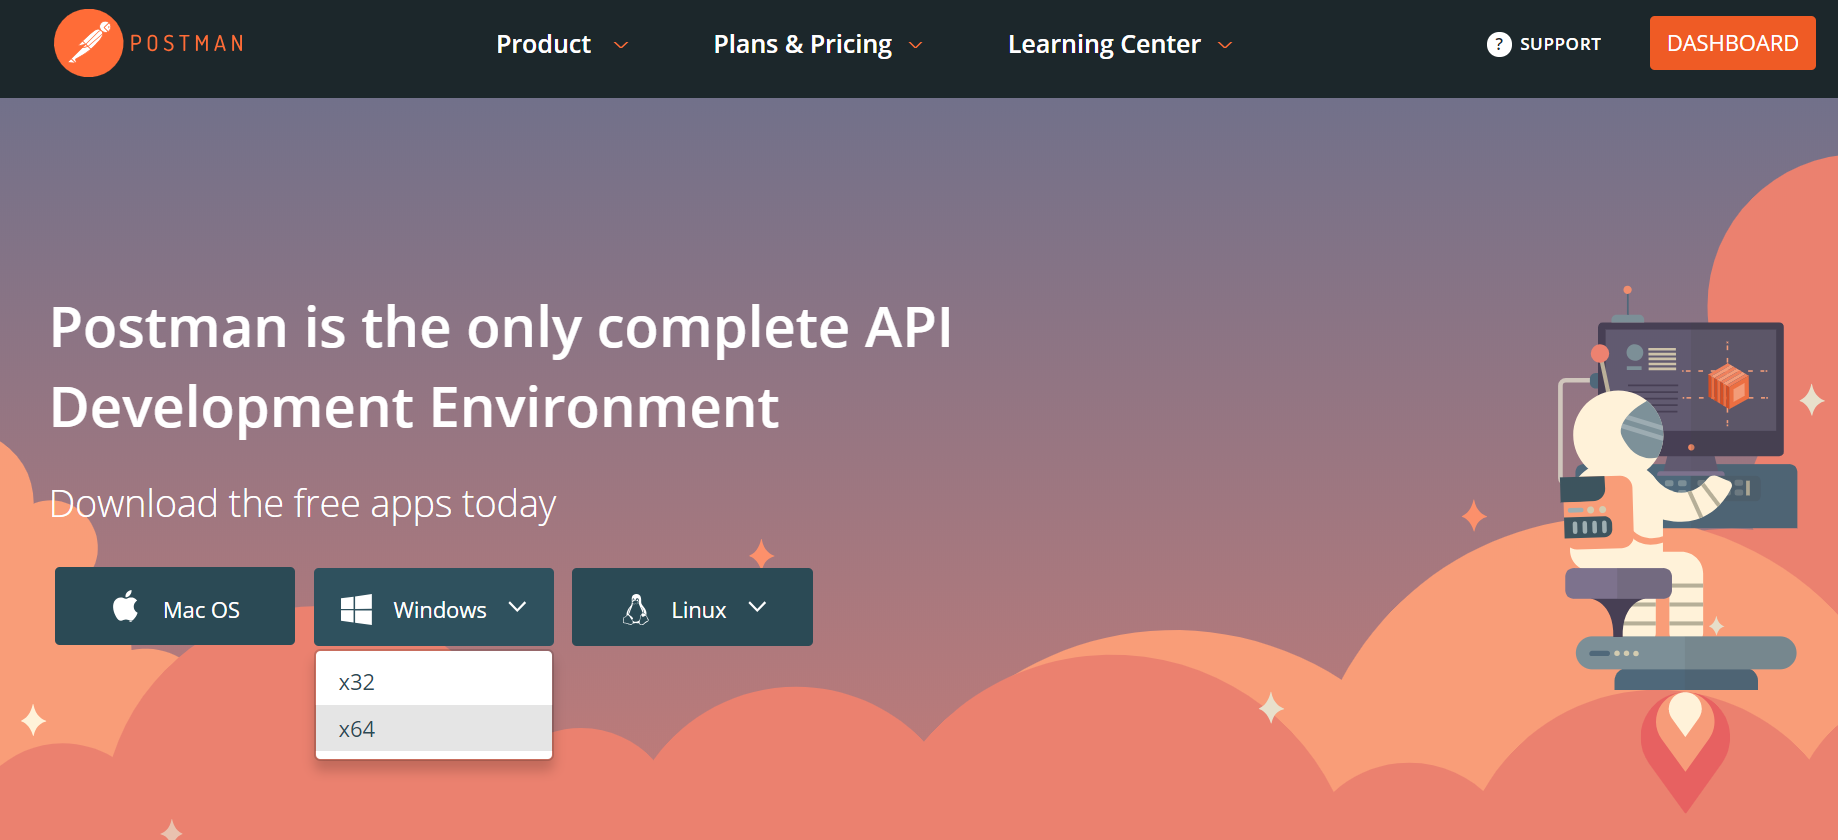
The installation of the local version is actually very simple. Just download the appropriate version from the official website according to your operating system type.

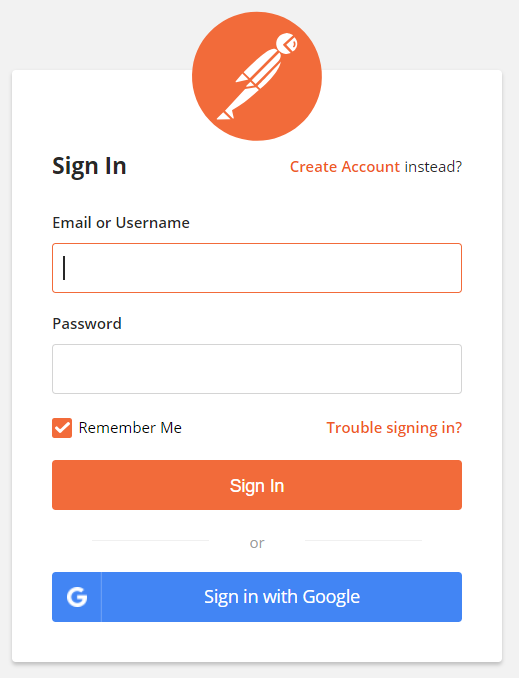
There is one more thing to note here, on the postman’s official website, we should register an account, as many advanced features will require this account to log in before they can be used.
Installation is complete when the Postman icon with the cool pose ![]() appears on the desktop.
appears on the desktop.
Postman Main Interface
Open Postman and enter, you will be prompted to select the type of task you want to create for the first time.
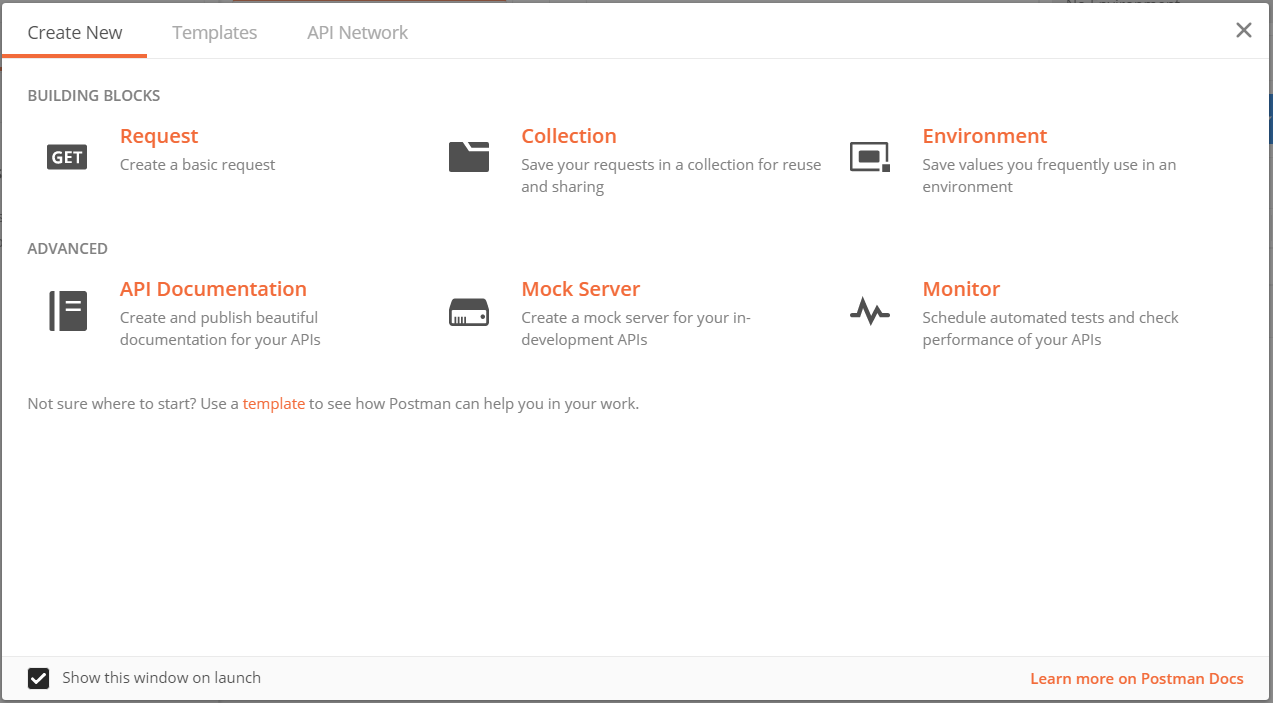 There are six types of tasks here, we will explain them in detail in the practical section below, but here is a brief explanation:
- Request is the foundation and core of Postman software, which is used to create request requests to complete the core work of API testing.
- Collection is actually a collection, which we can think of as a collection of a batch of Request requests, or a test set. It is also the basic unit of some advanced features of Postman
- Environment, literally understood as environment, can actually be considered as a collection of some configuration variables, which can have the effect of distinguishing different test environments through different configurations in practical applications The following three are advanced features of Postman
- API documention, is to automatically generate API documentation through the requests that we have debugged, which is convenient for team sharing and API delivery.
- Mock server When we are testing or developing APIs, we often need to simulate the interface server on the other end, and Mock server plays the role of simulating the server side.
- Monitor This is a monitoring function, through which we can monitor whether our interface is normal. In simple terms, this is actually a timed interface execution function.
Having a general understanding of the different types of tasks, let’s close this interface and look at the functional areas of the main interface
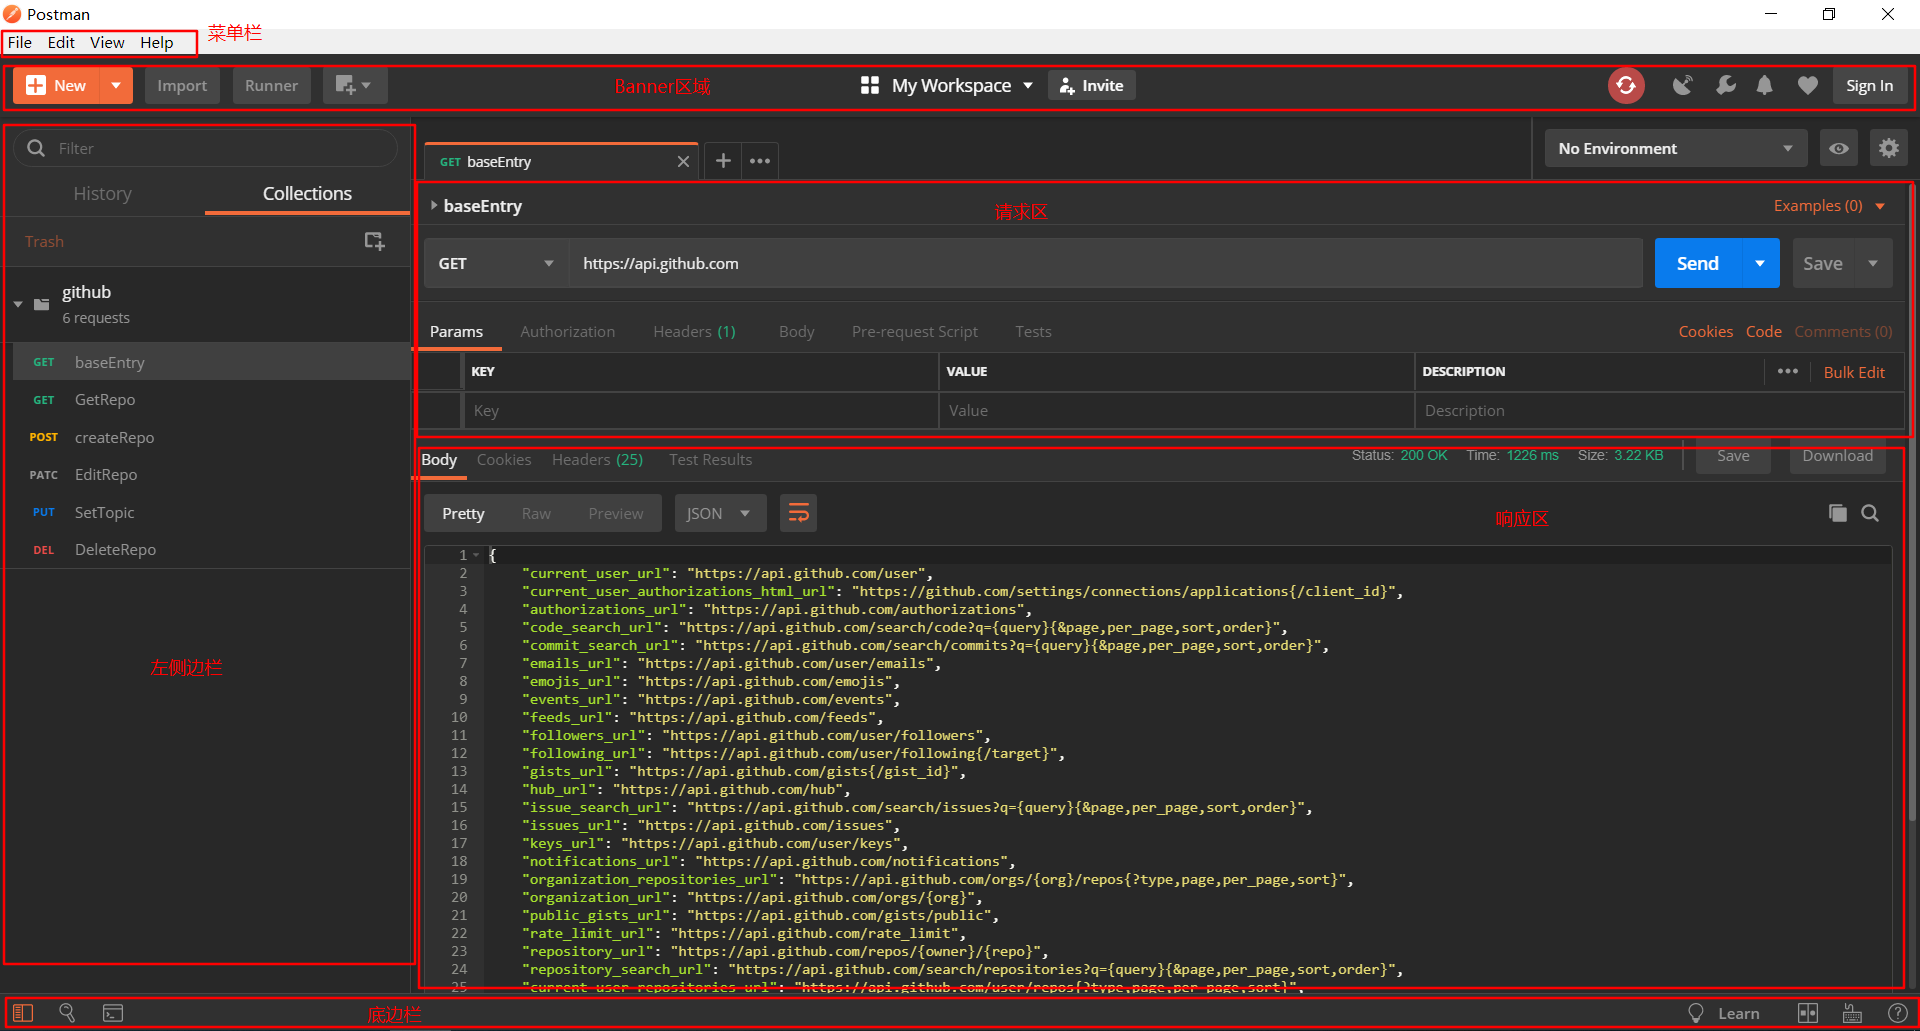
Banner Area
First is the menu bar above, corresponding to the various functions in the function area, all of which can be found in the corresponding menu on the menu bar. Then there is the banner area below. Introducing from left to right:
 will open the creation window at startup, used to create six types of tasks.
 button, can be used to import external files, external files can be postman’s Collection format files, data files, and other API definition files
 will start the Collection runner, which is a runner used to run established test tasks. We will have a detailed introduction later
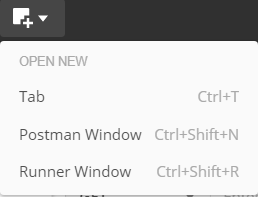 The fourth button, can create a new tab, or open multiple postman programs, or runner programs.
In the middle  is to select the workspace to use, but this requires account login, which will synchronize the workspace settings in the cloud. Each account will have a default workspace, which is a workspace that can be understood as similar to a project or engineering.
There are also several buttons on the right side of the banner bar 
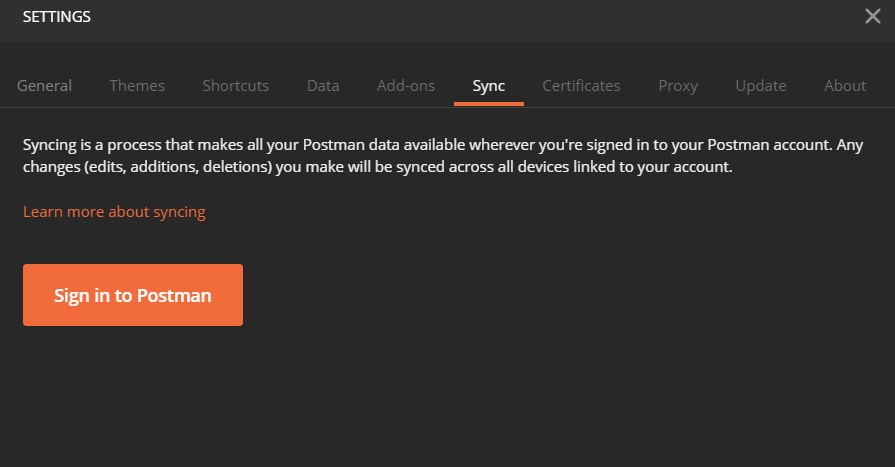
- The first is synchronization, which is also in the case of having an account, can synchronize the relevant interface test design in the workspace between multiple computers.
- The second proxy, is similar to the fiddler introduced earlier, providing proxy capture API functionality. Of course, this function is not as rich as Fiddler
- The third button includes settings and documentation guides. The settings are the local configuration of the software
- The fourth button is message notification, which is easy to understand, it will display some reminder information
- Then there is postman’s twitter, don’t look at it if you’re behind the wall
- Finally, there is login, which can be used to log in with a postman account
Setting
The usage properties and application settings of the Postman tool can be set in the Setting. The following are explained separately:
General

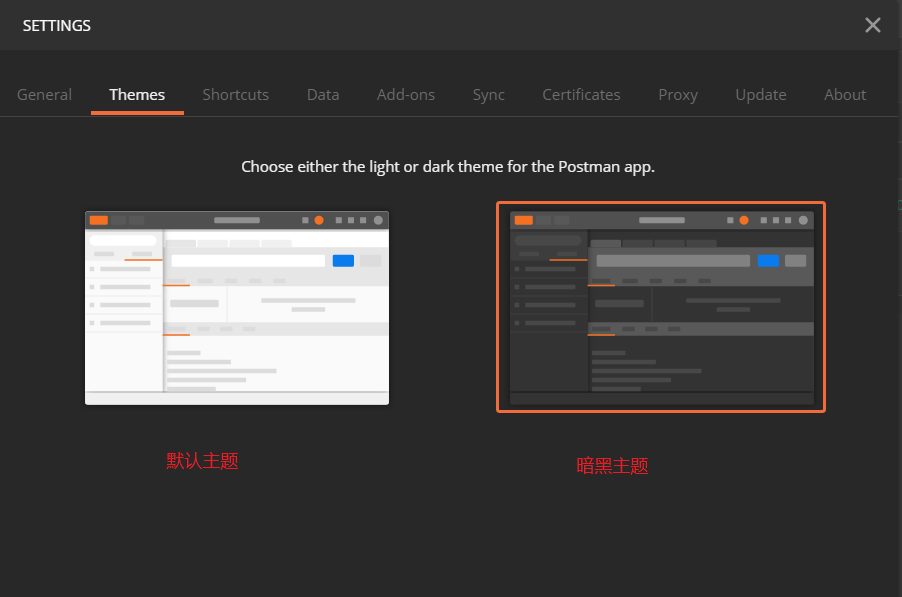
Themes
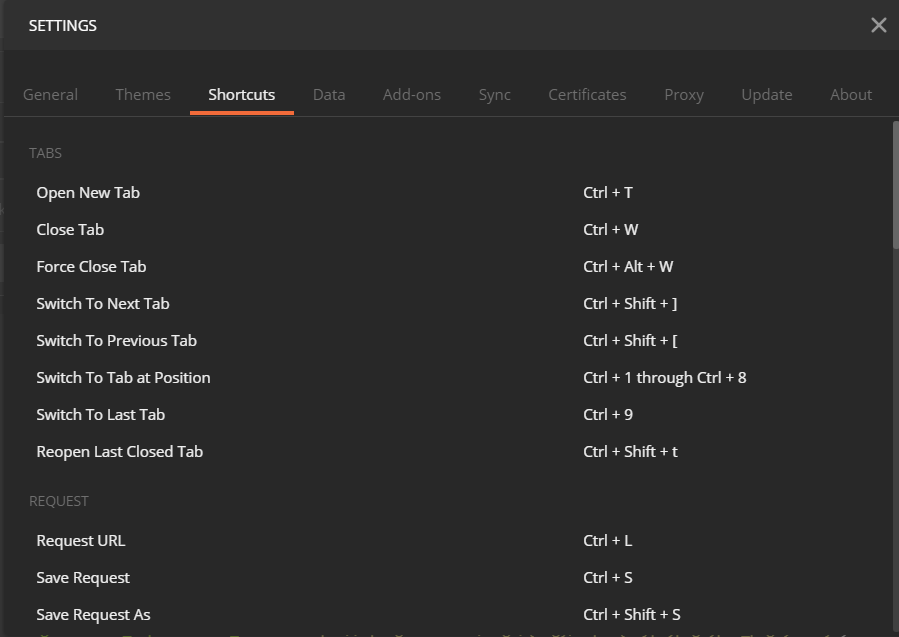
Shortcuts
Tool shortcuts
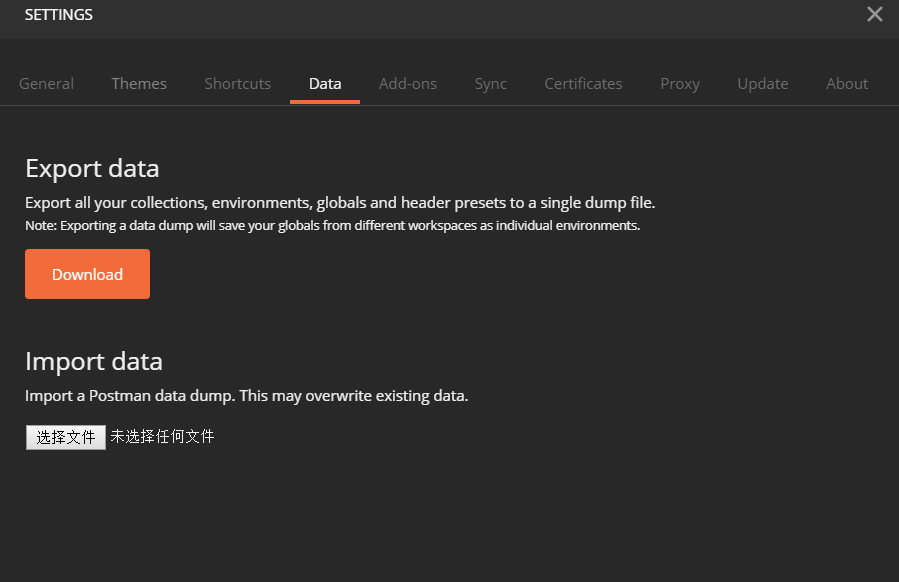
Data
Tool data import and export
add-ons
Newman plugin download method

Sync
Synchronization settings
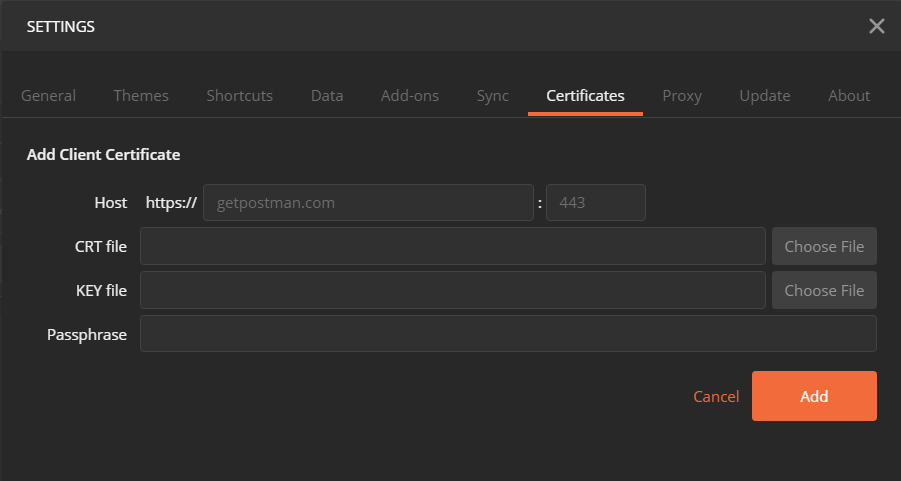
certificates
Local certificate settings
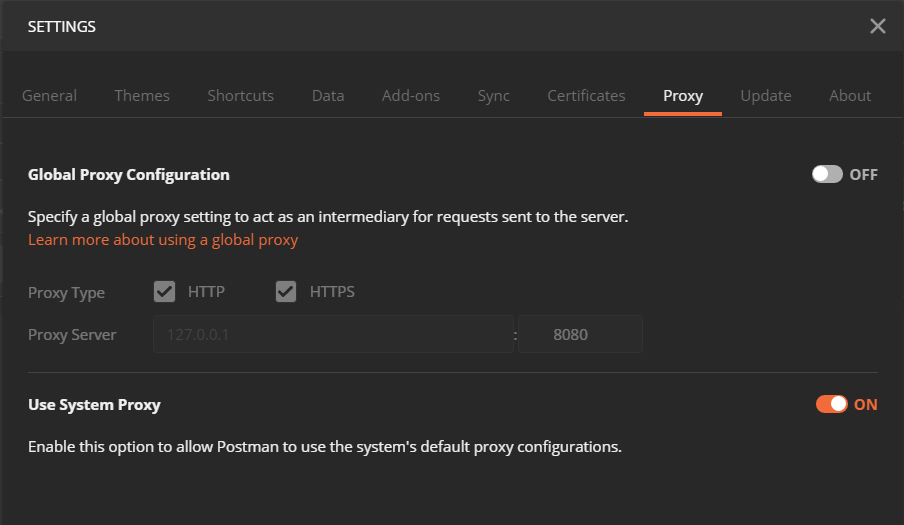
Proxy
Local network proxy settings
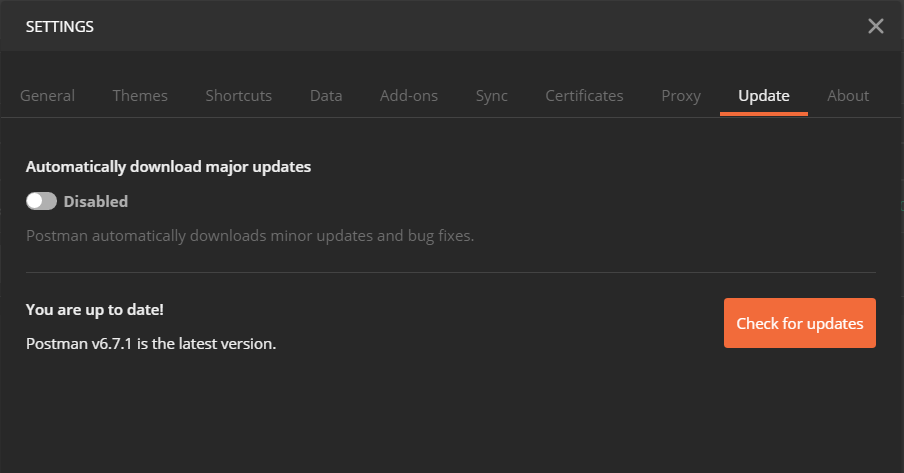
update
Upgrade settings
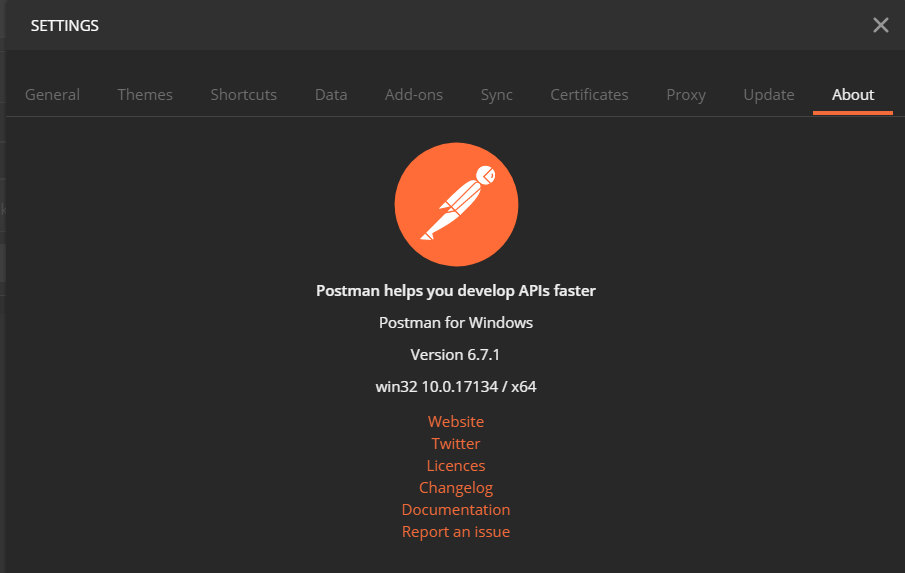
about
Tool About… and other version information
Left Sidebar
- filter bar, filter to display different messages
- history is a list of operation message records
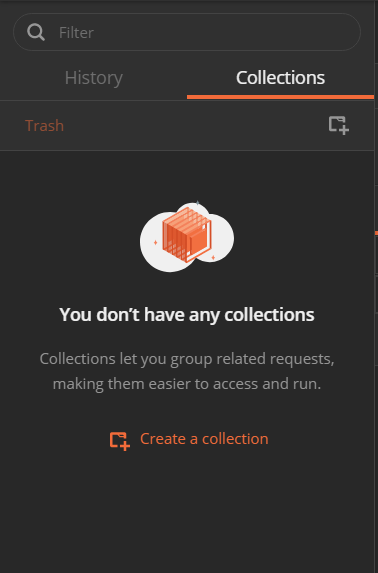
- collection as introduced earlier, displays request collections
Bottom Status Bar

- Leftmost, show and hide the left sidebar
- Then there is the search function, which is easy to understand
- The third is the console, where you can see detailed information about messages

- User guide
- Adjust the display style of the function area
- Shortcut list reference
- Help related links
Main Function Area
Mainly includes two parts, the upper part is the request area, and the lower part is the response area. It can also be displayed in left and right.
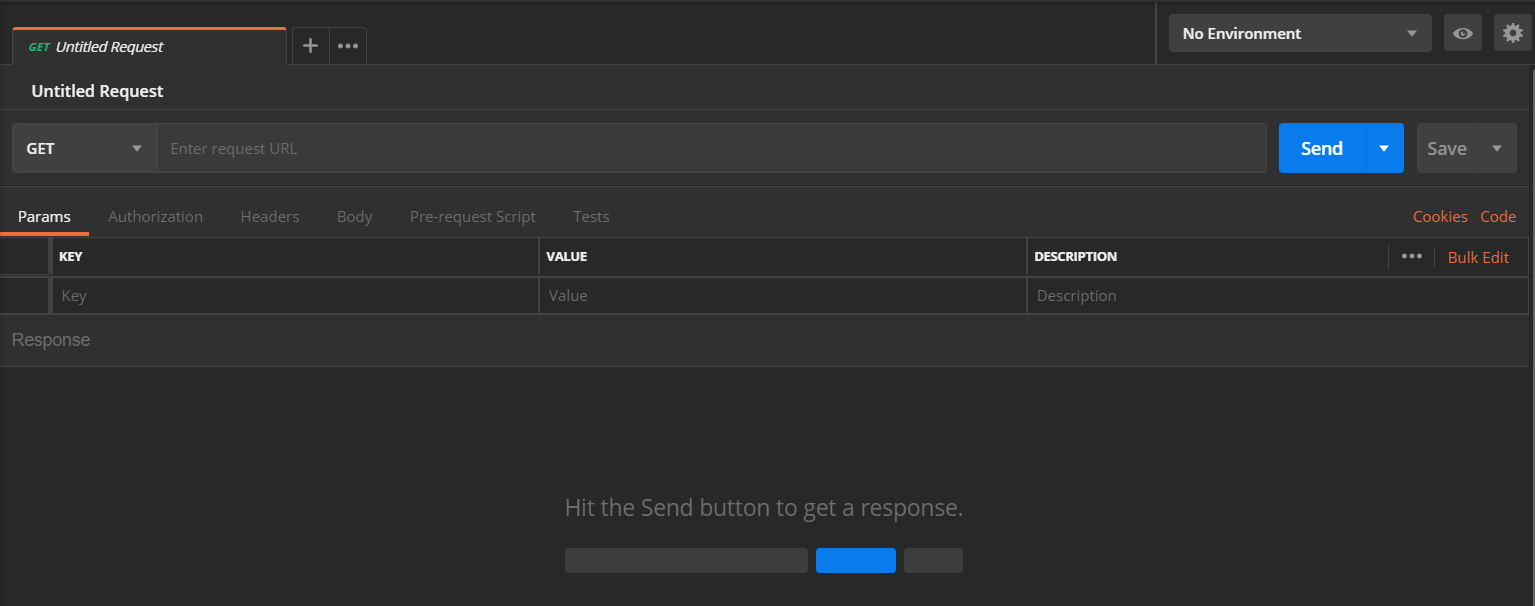
Request Area

The request part has a tab open by default, and multiple tabs can be opened for simultaneous editing.
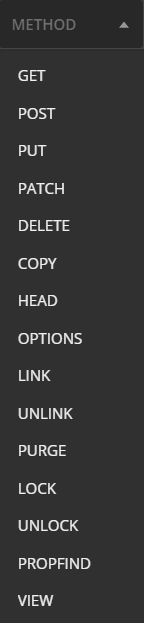
The GET method is used by default, which is also the most used HTTP method. You can select other methods from the dropdown, what are the commonly used ones? POST, PUT, Delete, etc.
 Enter the request address in the URL section. For example, we enter the root address of the GithubAPI.
 param is the parameter management interface, where we can add parameters (with key-value, block editing mode).

Send to send the request, the small arrow below send and download, will export the response message as json after sending. The save button next to it is to save this request as a case to the collection.
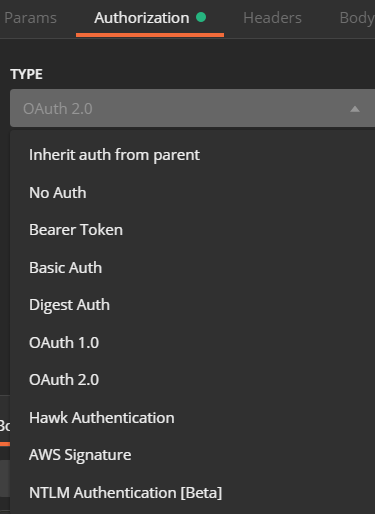
Authentication part, although the request editor is powerful enough to handle authentication messages, authentication is often a frequently used function, so Postman separately extracts the authentication part and encapsulates most of the current authentication methods
- Inherit, default authentication method
- No Auth
- bearer token authentication, also called Json web token, which is actually sending a token in json format, and the server will decrypt and verify the token
- Basic Auth basic verification, providing username and password verification, postman will automatically generate authorization, common authentication method
- digest auth, digest authentication Extends security on basic authentication, the server generates a unique random number for each connection, the client uses this random number to MD5 encrypt the password, then returns it to the server, the server also encrypts the password with this random number, and then compares with the encrypted data transmitted by the client, if consistent, returns the result. It is a two-step verification process, there will be two authentication interaction messages Client requests resource -> Server returns authentication mark -> Client sends authentication information -> Server verifies authentication
- Oauth, generally used for third-party authentication, with versions 1 and 2, requiring different information. Also a common authentication method
- Hawk authentication, is another authentication scheme, using a message code authentication algorithm, similar to Digest authentication, it also requires two interactions
- AWS signature authentication, is an authentication method for Amazon AWS public cloud user signatures
- NTLM is Microsoft’s LAN management authentication protocol
Just have a basic understanding, generally the more commonly used are basic and OAuth2.

header is message header management, where you can define header information.
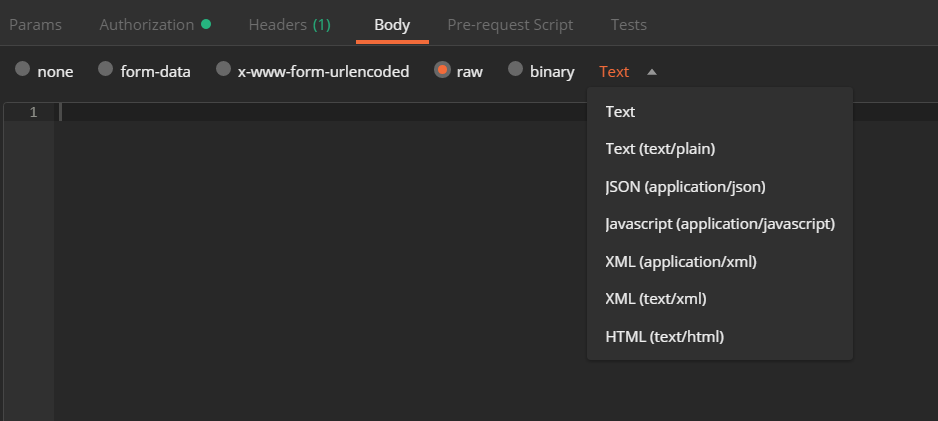 Body, request message body. Generally, requests that will update content such as Post, put, patch, etc. will carry a message body.
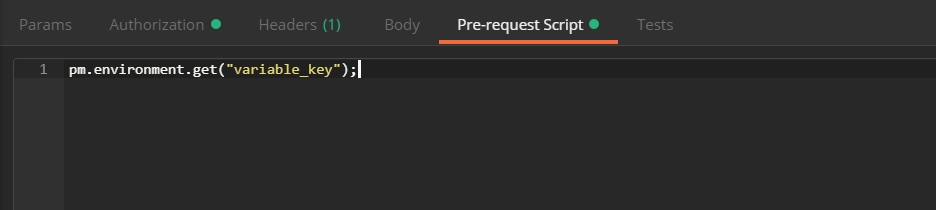
Next to it is pre-script, which means that some preprocessing work can be done before the request is sent, similar to the setup method in unit testing frameworks such as junit, supporting js script syntax
 Test is to verify or otherwise process the response after the response, similar to the teardown method in the junit framework, also supporting js script syntax
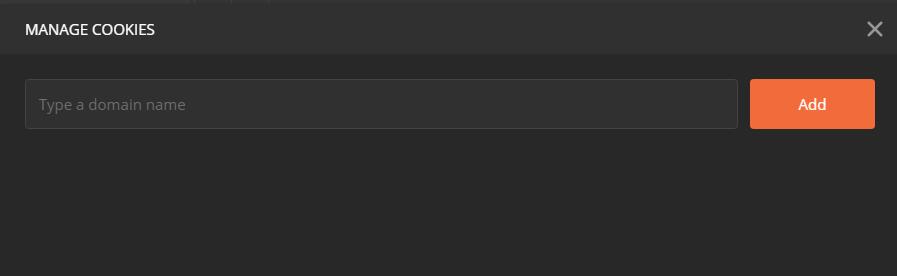
cookie management postman local cookie information
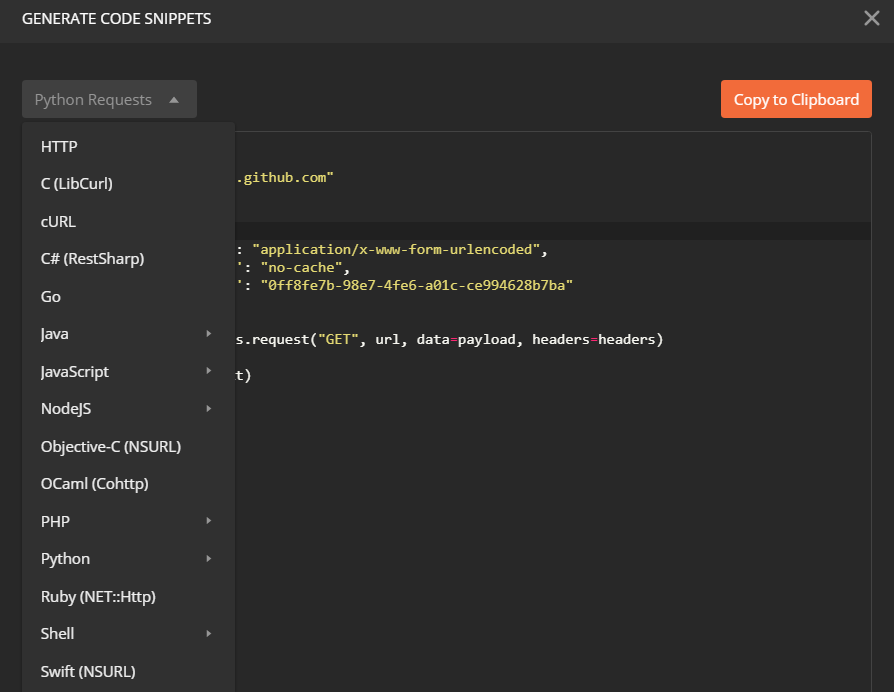 code is a convenient function for programmers, which can automatically convert interface requests into related language coding, you can see that the supported languages are very rich, basically covering various mainstream programming languages.
Response Area

In the upper right corner of the response message is the status code, hover to see a detailed explanation. Also, there is the response time (from the time the request is sent to the time the client receives it), and the message size (including message header and message body).
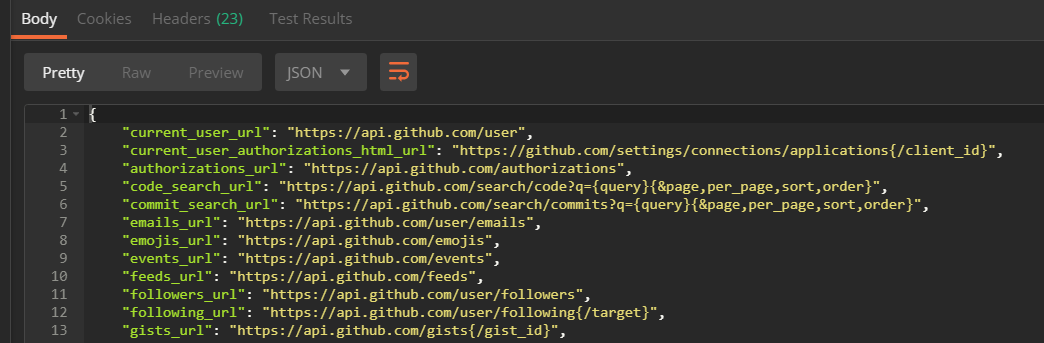 Response body part, i.e., message body. Includes the following buttons
- pretty, can format the display according to the presentation type, default json, if it is other format types, you can select the corresponding form for formatting.
- Raw is the unformatted form
- preview is the preview, which is how it looks when rendered in the browser, for example, if the return is html, it is very intuitive.
- Next to it is the auto-wrap button.
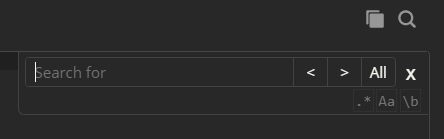
On the right are copy to clipboard and search buttons (regex, case sensitive, whole word match)
Other tabs:
- cookie: cookie information of the response message
- header: header information of the response message
- Test Results: After adding a test Script to the request, the verification results of the test script will be displayed here
Summary
This article introduces the basic concepts of REST API and the basic usage of Postman. In the next article, we will introduce how to use Postman to test REST API in detail.
The main points covered in this article include:
- Understanding of REST API and its basic concepts
- Installation and basic interface of Postman
- Basic usage of Postman’s request and response areas
- Understanding of various settings in Postman
In the next article, we will focus on:
- How to use Postman to test REST API
- How to use Postman’s various advanced features
- How to use Postman for automated testing